Train Your Dog to Tolerate Nail Trimming at Home (2026)
Introduction
If you've ever wrestled with a squirming, terrified dog while trying to trim their nails, you know the drill. Your heart races as your dog frantically tries to escape. You might manage to clip one or two nails before everyone needs a break—and by "break," I mean your dog hides under the bed for the next hour while you question your life choices.
Here's what most dog owners don't realize: nail trimming tolerance isn't instinctive. Dogs aren't born accepting having their paws handled and their nails clipped. In fact, from your dog's perspective, it's completely reasonable to be suspicious of someone restraining their feet and bringing a strange tool near their toes. They haven't read the manual explaining this is for their benefit.
The good news? Nail trimming tolerance is absolutely a trainable skill. With the right approach, even the most nail-phobic dog can learn to calmly accept—or at least tolerate—regular trims at home.
Why This Matters More Than You Think
Beyond avoiding the biweekly wrestling match, teaching your dog to accept nail care offers real benefits:
- Health first: Overgrown nails cause pain, alter your dog's gait, and can lead to joint problems over time. Regular trimming prevents these issues before they start.
- Cost savings: Professional grooming visits add up quickly. Once your dog tolerates home nail care, you'll save hundreds of dollars annually.
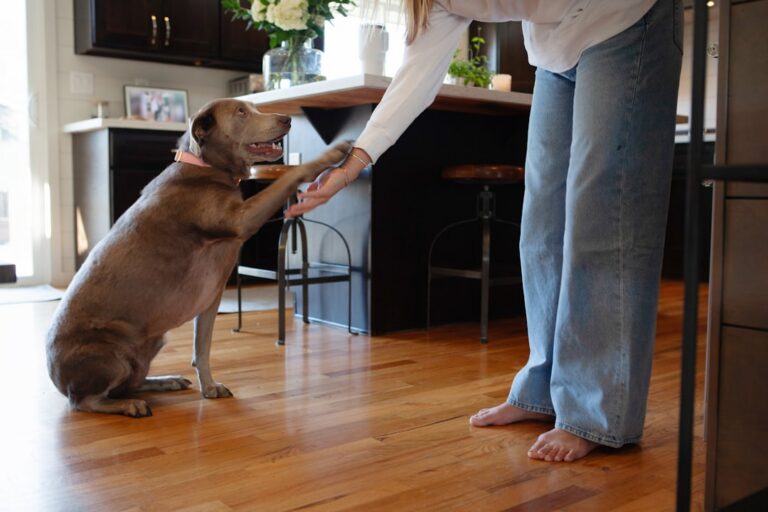
- Strengthened bond: Successfully working through this training builds trust between you and your dog in ways that everyday interactions simply don't.
- Emergency preparedness: If your dog ever needs veterinary care involving their paws, prior desensitization makes these experiences far less traumatic.
What This Guide Will Teach You
This article walks you through a systematic desensitization approach—a fancy term for gradually exposing your dog to nail trimming in tiny, manageable steps. We'll start with simply touching your dog's paws and work up to using actual nail clippers, with each step carefully designed to keep your dog under their stress threshold.

Check Price on Amazon →
You'll learn exactly how to break down the process, recognize signs your dog is becoming uncomfortable, and adjust your training pace accordingly. This isn't about forcing compliance; it's about changing how your dog feels about nail care.
Set Realistic Expectations
Let me be straight with you: this process takes weeks, not days. If your dog is already fearful of nail trimming, you're working against established negative associations. Depending on your dog's anxiety level and your consistency with training, expect to invest 3-6 weeks of daily short sessions before you're successfully trimming all nails in one sitting.
That might sound like a long time, but compare it to years of stressful battles or expensive grooming visits. The investment pays off permanently. Dogs who go through proper desensitization often maintain their tolerance for life, turning nail care from a dreaded ordeal into just another routine part of their week.
Why Dogs Fear Nail Trimming (Understanding the Root Causes)
Let me be straight with you: your dog isn't being dramatic about nail trims. Their fear is rooted in legitimate biological and psychological reasons that deserve our understanding and respect.
Paws are incredibly sensitive for good reason. Dogs' paw pads contain a dense concentration of nerve endings that help them navigate terrain, detect vibrations, and maintain balance. The quick inside each nail contains both nerves and blood vessels, making it genuinely painful when nicked. From an evolutionary perspective, injured feet meant a dog couldn't hunt, escape predators, or survive. This deep-wired instinct to protect their paws is still very much alive in your Labradoodle snoozing on the couch.
Previous negative experiences create lasting associations. Maybe a groomer or vet tech moved too quickly. Perhaps someone accidentally cut the quick and your dog bled and felt pain. Or maybe well-meaning owners held their puppy down forcefully while he struggled. Dogs have excellent memories for scary situations. One painful nail trim can create anxiety that lasts for years. I've worked with eight-year-old dogs still terrified from a single bad experience as a puppy.
Restraint itself triggers fear responses. Most dogs feel vulnerable when held firmly in place, unable to move freely or escape. This is especially true for dogs who lack confidence or have control issues. When we grab their paw and refuse to let go despite their pulling away, we're essentially trapping them—which can trigger panic even before the clippers come out.
The sensory experience is genuinely unsettling. Clippers make a sharp snapping sound and create pressure and vibration through the nail. Grinders are even more intense—they're loud, they vibrate, and they generate heat and a burning smell that dogs find alarming. Imagine someone approaching your fingernails with a loud rotary tool while you're being held still. You'd probably flinch too.
Here's what surprises many owners: fear can develop even without pain. If a puppy never learns that paw handling is normal and positive, the mere novelty of nail trimming as an adult can be frightening. Dogs who missed critical socialization periods often show fear of routine handling simply because it's unfamiliar.
Signs Your Dog Is Anxious About Nail Trimming
Watch for these telltale behaviors:
- Pulling away or hiding when you bring out the clippers
- Lip licking, yawning, or whale eye (showing whites of eyes)
- Panting, drooling, or trembling
- Tucked tail or lowered body posture
- Attempting to leave the room when you reach for their paw
- Freezing or going stiff when you touch their feet
The Difference Between Mild Discomfort and True Fear
Mild discomfort looks like: slight pulling away, trying to take their paw back gently, shifting position, but accepting treats and staying relatively calm.
True fear involves: intense pulling, growling, snapping, attempting to flee, inability to take treats, prolonged stress signals after the session ends, or avoidance behaviors that last hours.

Check Price on Amazon →
Understanding this difference helps you tailor your approach. Mild discomfort can often be worked through with patience and treats. True fear requires a slower, more systematic desensitization plan—which we'll cover in the next sections.
Essential Tools and Setup for Stress-Free Nail Trimming
Getting the right equipment and creating a calm environment makes all the difference when teaching your dog to accept nail trims. Let's walk through what you actually need—without the unnecessary gadgets.
Best Nail Trimming Tools for Nervous Dogs
Nail clippers come in three main styles, each with distinct advantages:
Guillotine clippers work by inserting the nail through a hole and squeezing a blade down. They're excellent for small to medium dogs with thinner nails, but they require frequent blade replacement and can crush thicker nails instead of cutting cleanly.
Scissor-style clippers operate like regular scissors and give you more control over the cutting angle. I recommend these for nervous dogs because you can make tiny, gradual cuts. They work well across all dog sizes if you choose the right size tool.
Plier-style clippers are my go-to for medium to large dogs. They're durable, provide excellent leverage for thick nails, and allow precise cuts. The main downside? They can be intimidating-looking, so you'll need extra desensitization time.
Grinding tools (also called dremels) file the nail down gradually rather than cutting. Here's the honest truth: they're fantastic for anxious dogs once they're accustomed to the vibration and sound. The grinding process lets you work slowly and avoid hitting the quick, plus there are no sharp edges left behind. However, the noise and sensation scare many dogs initially, requiring patient introduction over several sessions.
My recommendation? Start with scissor-style clippers for training because they're quieter and less intimidating. Once your dog is comfortable with paw handling, you can introduce a grinder if desired.
Additional supplies you'll actually use:
- Styptic powder or cornstarch – Stops bleeding quickly if you nick the quick (it happens to everyone eventually)
- High-value treats – Think small pieces of chicken, cheese, or freeze-dried liver, not regular kibble
Check Price on Amazon →
- Non-slip mat or towel – Prevents sliding, which increases anxiety
- Good task lighting – A clip-on LED light helps you see the quick in darker nails
Setting Up Your Training Space
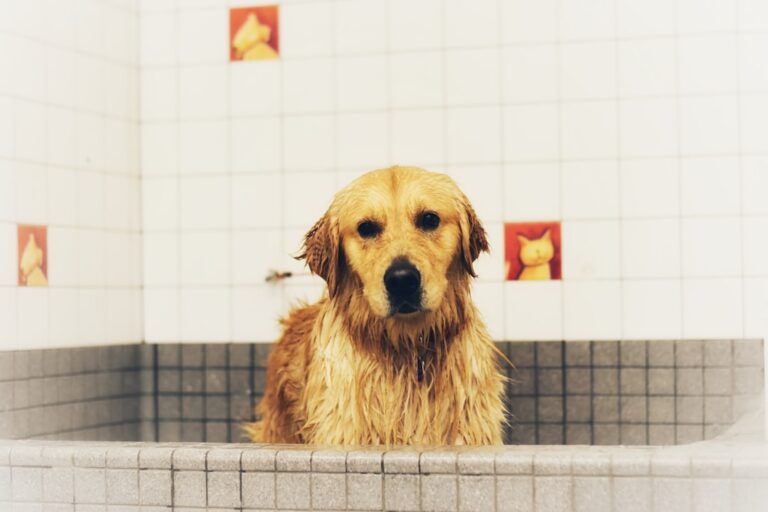
Location matters more than you'd think. Choose a quiet room away from household traffic where your dog already feels comfortable. I've trained countless dogs in bathrooms—the smaller space actually helps anxious dogs feel secure, plus tile floors make cleanup easy.
Lighting is non-negotiable. You need to clearly see the nail's anatomy, especially the quick (the pink blood vessel inside). Natural daylight is ideal, but a bright lamp positioned above works perfectly fine.
Your position and your dog's comfort are equally important. For small dogs, work on a table with your non-slip mat so you're not hunched over. Medium to large dogs can sit or lie on the floor beside you. Some dogs relax more lying on their side; others prefer sitting. Let your dog tell you what feels safest.
Should you use a helper? Only if your dog is already comfortable with paw handling but needs steadying. A helper who restrains a nervous dog creates negative associations that set your training back weeks. For genuinely fearful dogs, solo training with heavy treat rewards produces better long-term results. You'll move slower initially, but your dog builds positive associations instead of learning to tolerate being held down.
The Foundation: Teaching Paw Handling Before Trimming
Before you ever introduce nail clippers, your dog needs to be completely comfortable with you touching, holding, and manipulating their paws. This foundation work is absolutely critical—skip it, and you're setting yourself up for a wrestling match every time you attempt a trim.
The Touch-Treat-Release Method
Start by simply touching your dog's paw for one second, then immediately giving a high-value treat and releasing their paw. That's it. No holding, no fussing—just touch, treat, release. The sequence matters enormously because your dog learns that paw contact predicts something wonderful.
Here's your progression over the coming days and weeks:
Week 1: Basic touches
- Touch the paw briefly (1 second), treat, release
- Work on all four paws, one at a time
- 5-10 repetitions per paw, 2-3 times daily
Week 2-3: Gentle holds
- Hold the paw for 2-3 seconds, treat, release
- Gradually extend holding time to 5-10 seconds
- Add slight movements—lifting the paw slightly, rotating gently
Week 3-4: Toe isolation
- Hold the paw and touch individual toes
- Apply gentle pressure on each toe pad (this mimics the position during actual trimming)
- Hold individual toes for a few seconds while continuing to deliver treats
Check Price on Amazon →
The key to success is using genuinely high-value rewards—think small pieces of chicken, cheese, or freeze-dried liver, not their regular kibble. You're building an association that paw handling equals jackpot rewards.
Important technique tip: Deliver the treat while you're holding the paw, not after you release it. This creates a positive association with the actual holding, not just with the end of the experience.
How to Know When Your Dog Is Ready to Progress
Your dog will tell you when they're ready to move forward—you just need to know what to look for. A dog who's ready for the next step:
Check Price on Amazon →
- Voluntarily offers their paw when they see you preparing
- Remains relaxed with loose body language during handling
- Continues eating treats smoothly without snatching or freezing
- Doesn't pull their paw away when you touch it
Red flags that mean you need to slow down or back up:
- Pulling the paw away repeatedly
- Turning their head away or refusing treats
- Lip licking, yawning, or whale eye (showing the whites of their eyes)
- Tensing their body or tucking the paw underneath themselves
- Attempting to leave the training area
If you see these stress signals, you've pushed too far. Drop back to whatever step your dog was comfortable with and spend more time there. There's no prize for speed here—only for building genuine comfort.
Practice schedule: Keep sessions short and sweet. Two to three minutes, multiple times per day, works infinitely better than one long 20-minute session. Your dog's brain needs time to process and consolidate these positive experiences. I typically recommend 3-5 mini-sessions daily, spread throughout the day whenever it's convenient—before meals, during TV commercial breaks, or while your coffee brews.
Remember: some dogs will breeze through this foundation in two weeks; others might need two months. Honor your individual dog's timeline. The patience you invest now pays dividends for years of stress-free nail maintenance.
Desensitizing Your Dog to Trimming Tools
The key to successful nail trimming is making the tools themselves completely unremarkable to your dog. Most dogs react fearfully because clippers and grinders appear suddenly, make strange noises, and immediately touch their sensitive paws. By breaking down the process into tiny, manageable steps, you'll build your dog's confidence and cooperation.
Desensitization Protocol for Nail Clippers
Start by placing the clippers on the floor during your dog's mealtime or while giving treats. Don't pick them up—just let them exist in your dog's space. After a few sessions, hold the clippers in your hand while your dog eats or plays. Reward any calm behavior around the tools.
Check Price on Amazon →
Next, work on the clicking sound. Click the clippers in the air while immediately delivering a high-value treat. Keep the clippers at your hip level initially, not near your dog's paws. Repeat 5-10 times per session until your dog's ears perk up at the sound, anticipating something good.
Now practice the motion without cutting. Hold your dog's paw gently, position the clipper near (but not touching) a nail, make the clicking sound, and treat. Gradually work up to touching the clipper to the nail without actually trimming. If your dog pulls away, you've moved too fast—go back a step.
Desensitization Protocol for Nail Grinders
Grinders require extra preparation because they combine sound, vibration, and sensation. Start with the grinder turned off, following the same introduction steps as clippers. Once your dog is comfortable, turn the grinder on in another room so your dog hears the muffled motor sound paired with treats.
Progressively move the running grinder closer over several sessions. Hold it near your dog (not touching) while dispensing treats continuously. When your dog remains relaxed, touch the grinder to your own fingernail first—let them see it's not scary. Then briefly touch it to one of their nails through the treat delivery process.
Check Price on Amazon →
A lick mat with peanut butter or wet food can be invaluable during grinder desensitization, keeping your dog occupied and calm while you work.
Teaching Your Dog a 'Chin Rest' or 'Paw Target' for Voluntary Participation
This cooperative care approach transforms nail trimming from something you do to your dog into something you do with them.
For a chin rest: Hold your flat palm out and reward your dog when they place their chin in your hand. Build duration gradually. This becomes their way of saying "I'm ready to participate." If they lift their chin, you stop immediately—giving them control reduces anxiety.
For a paw target: Teach your dog to place their paw on a small platform, towel, or your hand on cue. Reward them for holding the position. Eventually, this becomes their consent signal for nail work.
During actual trimming sessions, only proceed while your dog maintains their chin rest or paw target. If they break position, stop everything and give them a moment. This builds trust and shows them they have agency in the process. You'll find that dogs who can opt out rarely choose to—they feel safe enough to stay.
The Step-by-Step Nail Trimming Training Process
Now that your dog is comfortable with paw handling and nail clipper exposure, it's time to make that first cut. Remember: slow and steady wins this race. Rushing this stage is the number one reason dogs develop nail trimming phobias.
Stage 1: One Nail at a Time
Start with just one nail per session—seriously, just one. Choose a time when your dog is relaxed, trim the tiniest tip off one nail, then immediately deliver a high-value reward. I'm talking chicken, cheese, or whatever makes your dog's eyes light up. Keep
Check Price on Amazon →
readily accessible in a treat pouch so you can reward within one second of cutting.
The goal isn't perfectly trimmed nails right now. It's creating the association: nail clipper touch = amazing things happen.
After that single nail, end the session on a high note. Play with your dog or do something they love. Come back to it tomorrow with a different nail.
Building Up Gradually
Once your dog happily accepts single-nail trims for 3-5 sessions, try two nails. Then three. Let your dog's body language dictate the pace—if they're pulling away, yawning excessively, or showing stress signals, you've moved too fast. Drop back to fewer nails per session.
Most dogs can work up to a full paw (4-5 nails) within 2-3 weeks. Some take longer, and that's completely fine.
When You Hit the Quick
It happens to everyone eventually. If you accidentally cut too deep and your dog yelps, stay calm. Your reaction matters more than the brief pain.
Apply styptic powder to stop the bleeding, then—and this is crucial—give your dog a treat anyway. Yes, really. You need to preserve the positive association. If you end the session in panic mode, you've just created a negative memory that will haunt your next attempt.
Take a break for the rest of that session, but return to nail trimming the next day with an easier nail (just a tiny tip) to rebuild confidence.
Sample Training Timeline Week-by-Week
- Week 1-2: One nail daily, high-value rewards
- Week 3: Two to three nails per session
- Week 4-5: Full paw in one session
- Week 6+: All four paws, possibly across two sessions
This timeline assumes consistent daily practice. Your dog may progress faster or need more time.
Troubleshooting: What to Do When Progress Stalls
Hit a plateau? Try these adjustments:
- Better treats: Upgrade your reward value
- Shorter sessions: You might be asking for too much
- Different clipper type: Some dogs prefer guillotine vs. scissors-style
- Time of day: Work when your dog is naturally calmer
- Review previous steps: Go back to desensitization without cutting
How to Handle Setbacks Without Losing Ground
Had a bad session? A guest trimmed too aggressively? Don't panic. Setbacks are normal.
Immediately return to a step where your dog was 100% comfortable—even if that means going back to just touching paws. Rebuild confidence with several successful easy sessions before progressing again. Think of it as taking two steps back to take three steps forward.
Maintenance Schedule
Once your dog tolerates full nail trims, maintain those skills with weekly practice sessions, even if you only trim a few nails. Regular exposure prevents regression. Most dogs need actual nail trims every 2-3 weeks, but keep doing brief practice sessions between full trims to keep the skill sharp.
Advanced Techniques for Extremely Fearful or Reactive Dogs
Some dogs have developed such intense fear around nail trimming that standard desensitization isn't enough. If your dog panics at the sight of clippers, has bitten during previous attempts, or shuts down completely, you'll need specialized approaches and possibly professional support.
Cooperative Care for Difficult Cases
Cooperative care goes beyond basic desensitization—it teaches your dog they have a voice in the process. The foundation is a "start button" behavior: your dog actively signals they're ready to proceed, and you immediately stop when they withdraw consent.
Here's how to implement it: Teach your dog to place their chin on your hand or a target. This becomes their "yes, I'm ready" signal. Present the nail trimmer (not touching yet), and if they keep their chin down, mark and reward. The moment they lift their chin, you stop and move away. You're teaching them: "You control this scary thing."
Break sessions into micro-steps. With severely anxious dogs, one good session might be: dog sees clipper from across the room while chin resting, gets rewarded, done. That's success. The next day, maybe the clipper comes two feet closer. Expect this process to take weeks or months.
Consider environmental management too.
Check Price on Amazon →
can provide distraction during the most challenging moments—spread peanut butter or plain yogurt on it and let your dog lick while you handle one paw for three seconds. Calming music designed for dogs (yes, it’s a real thing with research backing) can lower baseline anxiety. Some dogs benefit from

Check Price on Amazon →
, which applies gentle pressure that helps certain anxious dogs feel more secure.
When Professional Help Is Necessary
If your dog has bitten or attempted to bite during nail care, it's time to call in a professional. A certified veterinary behaviorist or trainer experienced in fear-based aggression can assess whether your dog needs anti-anxiety medication before training can even begin.
Medication isn't "giving up"—for dogs with genuine panic disorders, calming supplements or prescription medications can lower anxiety enough that they can actually learn. Your vet might recommend options ranging from situational medications (given before nail trimming) to daily supplements. This is a tool, not a permanent solution, but it can make the difference between progress and repeated trauma.
Muzzle training is another tool worth considering, but only if done correctly. A properly conditioned muzzle (basket style, allowing panting and treats) protects everyone while you work through the process. Spend 2-3 weeks making the muzzle a positive predictor of good things before ever using it during nail care.
Check Price on Amazon →
Alternative solutions exist too. Scratch boards—textured surfaces your dog scratches on command—naturally file nails. Many dogs find this far less threatening since they're in control. Some trainers have excellent success teaching dogs to use emery boards or filing blocks. The dog does the work themselves, which eliminates the restraint component that many fearful dogs find most triggering.
Remember: severe fear didn't develop overnight, and it won't resolve quickly. Patience and professional guidance give you the best chance of success.
Maintaining Long-Term Success and Preventing Regression
You've done the hard work—your dog now tolerates nail trimming! But here's the truth: success isn't a destination; it's an ongoing practice. Dogs can develop new anxieties or forget their training if we get complacent. Let's talk about keeping those paws cooperative for life.
Keep Pairing Trimming with Good Things
Even after your dog accepts nail trimming calmly, continue reinforcing the behavior. Don't fall into the trap of thinking, "She's fine now, so I don't need treats anymore." That's how regression starts.
Keep using high-value rewards during and after each session. If your dog loves their
Check Price on Amazon →
, spread some peanut butter on it during trimming time. The positive association should never fade—it’s what makes nail care a non-event rather than a tolerated chore.
Practice Paw Handling Between Sessions
Don't only touch your dog's paws when it's trimming time. Make paw handling part of your regular routine:
- Touch and gently squeeze paws during petting sessions
- Practice holding each paw for 5-10 seconds while watching TV
- Run your fingers between their toes during grooming
- Occasionally bring out the clippers just to tap them gently on nails (without cutting)
This desensitization prevents your dog from thinking "paw touch = nail trim = worry." Instead, paw handling becomes background noise in daily life.
The Power of Brief Sessions
Always keep sessions short and end on a high note. Trimming one or two nails, then stopping with praise and treats, beats struggling through all four paws. If you only get three paws done today, that's fine—finish the fourth tomorrow.
Watch for subtle stress signals like lip licking, yawning, or turning away. These are your cues to wrap up before your dog hits their threshold. It's better to do frequent mini-sessions than push for completion and undo your progress.
Handling Regression
Life happens. Moving, a new baby, or even accidentally quicking a nail can trigger setbacks. If your dog suddenly becomes anxious again:
- Go back to basics—reintroduce the desensitization steps
- Lower your criteria temporarily (maybe just touch paws without clippers for a few sessions)
- Increase reward value and frequency
- Consider whether something in your routine changed (different location, time of day, or your own stress levels)
Never punish or force through regression. Patience rebuilds trust faster than pushing forward.
Get Everyone On Board
Consistency is critical. If you're doing everything right but your partner restrains your dog and rushes through trimming, you're working against yourself.
Hold a family meeting. Demonstrate the protocol. Have everyone practice the same approach: slow movements, constant rewards, calm energy. Even kids can learn to hand out treats during sessions, making them part of the positive experience.
Adjusting for Senior Dogs
Older dogs and those with arthritis need special consideration. Holding paws in awkward positions may genuinely hurt. For these dogs:
- Support the leg rather than pulling it up
- Work with their natural range of motion
- Take even more frequent breaks
- Consider a veterinary nail trim under light sedation if handling causes pain
Celebrate every success, no matter how small. Progress isn't always linear, but with consistency and compassion, nail trimming can remain stress-free for years to come.
Frequently Asked Questions
How long does it take to train a dog to tolerate nail trimming?
For most dogs with mild to moderate anxiety: 3-6 weeks of consistent daily training. Severely fearful dogs may need 2-3 months or longer. The key is progressing at your individual dog's pace rather than rushing. Even dogs with no previous fear can benefit from 1-2 weeks of positive conditioning.
What treats work best for nail trimming training?
Use high-value treats your dog doesn't get regularly (small pieces of chicken, cheese, freeze-dried liver). Treats should be tiny (pea-sized) so you can deliver many without filling up your dog. Soft treats work better than crunchy ones – allows for quick eating and continued focus. Some dogs respond well to squeeze tubes with peanut butter or wet food for continuous licking during the process.
Should I hold my dog down if they struggle during nail trimming?
No – restraining a struggling dog increases fear and can damage your relationship. Physical restraint teaches dogs they have no control, leading to panic or aggression. Instead, stop the session and return to an easier step in the training process. The goal is voluntary cooperation, which creates lasting success rather than temporary compliance.
What should I do if I cut the quick and my dog's nail bleeds?
Stay calm – your reaction influences your dog's emotional response. Apply styptic powder or cornstarch to stop bleeding (usually stops within 5 minutes). Give your dog extra treats and comfort, then end the session positively. Resume training the next day with paw handling only, then rebuild confidence gradually. Quick cuts happen to experienced groomers too – one incident doesn't ruin all progress if handled well.
Can I use a nail grinder if my dog is afraid of the sound?
Yes, but you must desensitize to the sound separately before using it on nails. Start by running the grinder across the room while giving treats, gradually moving closer over multiple sessions. Once comfortable with sound, touch the vibrating grinder to your dog's body (shoulder, back) before approaching paws. Grinders can actually be better for anxious dogs once desensitized since they remove less nail per pass and avoid the quick more easily. The entire desensitization process may take 2-4 weeks before actual grinding.