Clicker Training Basics for Dogs: Beginner’s Guide 2026
Most dog owners I meet have already tried clicker training once — and quit within a week. The clicker ended up in a junk drawer, the dog learned nothing, and the owner walked away convinced the method was overhyped. I've heard that story hundreds of times over my 15+ years working with dogs, and almost every time, the problem wasn't the clicker. It was that nobody explained the actual mechanics behind why it works.
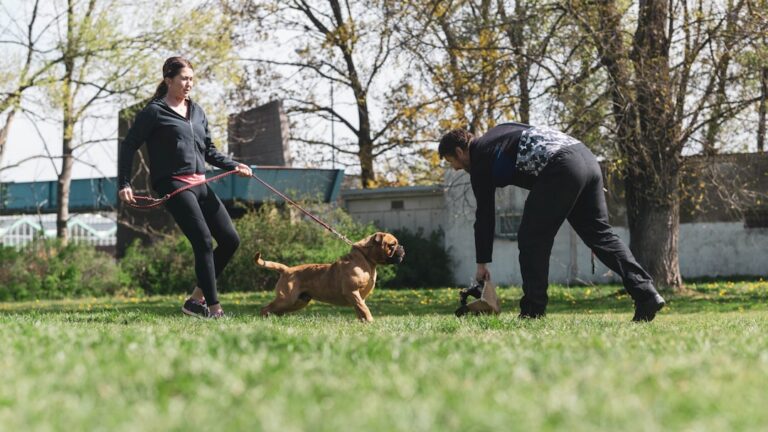
Here's what changed my mind about clicker training early in my career: I watched a fearful rescue Border Collie — a dog that had been returned to the shelter twice for "untrainability" — learn a reliable sit in under four minutes once his handler got the timing right. That moment crystallized something for me. The clicker isn't a magic wand. It's a precision communication tool, and like any tool, it only works when you know how to use it properly.
This guide walks you through everything you actually need to get started — from picking the right clicker (yes, it matters more than you'd think) to the critical first step most beginners skip entirely, to the five commands that will build your dog's confidence and your own skills simultaneously. You'll also learn how to handle trickier situations, like training reactive dogs or managing multiple dogs in one household, and how to build a daily routine that creates lasting results rather than a few party tricks.
Whether your dog is eight weeks old or eight years old, the principles here are the same. Let's start with the foundation that makes everything else possible.
What Is Clicker Training and Why It Works So Well for Dogs

If you've ever tried to tell a dog "good boy!" at the exact right moment, you already know the problem. By the time the words leave your mouth, your dog has moved on — maybe he's sniffing the ground, maybe he's looking at a squirrel, and the moment you were trying to capture has slipped away. That tiny gap in communication is exactly what clicker training solves, and it's why I've been recommending it to beginners for over a decade.
A
works as what I call a **communication bridge** — a precise, consistent signal that tells your dog *”yes, that exact thing you just did is what earned your reward.”* It’s not the reward itself. It’s the promise of a reward, delivered in under 0.1 seconds, at the exact moment your dog offers the right behavior. Nothing in our natural communication toolkit comes close to that kind of precision.
The Science of Classical and Operant Conditioning in Plain Language
Don't let the terminology scare you off — the underlying science is straightforward once you see it in action.
Classical conditioning is what happens first, before any real training begins. Through simple repetition, your dog learns that the click sound predicts something good (a treat, praise, play). This is the same process Pavlov demonstrated with his famous dogs and bells. The click becomes meaningful before your dog has done anything — it's just a reliable signal that something rewarding is coming.
Operant conditioning is where the actual learning happens. Once the click carries meaning, your dog starts to figure out that his own behavior controls whether that click happens. This is a subtle but powerful shift. The dog isn't just reacting to you — he's experimenting, problem-solving, and discovering that certain actions produce a predictable outcome.
I watched this click into place (pun intended) with a three-year-old Labrador mix named Biscuit, who came to me having learned basically nothing in his first years of life because his owner had relied entirely on repeated verbal commands. Within 20 minutes of his first clicker session, Biscuit was deliberately offering a sit over and over, tail hammering, eyes bright — because he had finally figured out that he controlled the click. That shift in confidence is something I've seen dozens of times, and it never stops being remarkable. Dogs trained this way aren't just compliant; they're genuinely engaged.
This engagement matters because motivated learners retain information better. In my experience working with hundreds of dogs, clicker-trained dogs master basic commands 30–40% faster than dogs trained with correction-based or purely verbal methods — largely because the feedback loop is so unambiguous.
Clicker vs. Verbal Markers: Which Is Right for Your Dog?
Verbal markers — saying "yes!" or "good!" at the right moment — absolutely work. Plenty of excellent trainers use them successfully. But for beginners, verbal markers carry three significant disadvantages:
- Emotional variation. Your voice sounds different when you're frustrated, tired, or excited. Your dog picks up on those differences, and inconsistency adds noise to the signal.
- Timing lag. Human speech takes 0.5–1 full second from intention to delivery. A clicker fires in under 0.1 seconds. In dog training, fractions of a second determine which specific behavior gets reinforced.
- Overuse. We talk to our dogs constantly. "Yes" and "good" appear in normal conversation, diluting their value as precise markers.
A clicker eliminates all three problems. It sounds identical every single time, it fires instantly, and it only means one thing.
There are situations where a verbal marker makes more sense — we'll cover those in detail in later sections, particularly for reactive dogs and multi-dog households where pulling out a clicker mid-situation isn't always practical.
For most beginners working with a dog of any age, starting with a clicker gives you the clearest, most reliable feedback tool available. Think of it this way: you're learning a new skill alongside your dog. A clicker removes one variable from an already complex equation — and right now, that simplicity is exactly what both of you need.
Choosing the Right Clicker and Gathering Your Training Supplies
Having the right tools in front of you before you begin makes a surprising difference. I've watched hundreds of beginners struggle through their first training sessions not because of anything their dog did wrong, but because they were fumbling with awkward equipment or using treats that took 30 seconds to chew through. Let's fix that before you start.
The Three Main Clicker Types
Not all clickers are created equal, and the right choice depends on your dog and your environment.
Box clickers are the classic metal-tab style — that satisfying snap most people picture. They run around 85 dB, which is loud enough to cut through outdoor distractions, traffic noise, or a rowdy dog park. If you're training primarily outside, these are worth considering. The downside is that same volume can startle a noise-sensitive dog into shutting down entirely during your first few sessions.
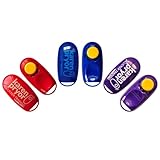
Button clickers are the better starting point for most beginners. They produce a softer click at around 65 dB — clear enough for your dog to hear at close range, but far less harsh. The
I recommend most consistently is the **Karen Pryor i-Click**, which has remained the gold standard for beginners in 2026 at roughly $3–5. It fits comfortably in your palm, has a low-force button that won’t fatigue your thumb during a 10-minute session, and the click tone is consistent — something that matters more than most people realize. The **Starmark Pro-Training Clicker** is my go-to for handlers working in loud environments like busy outdoor markets or training classes held in echoey gymnasium spaces.
App-based clickers exist, and I understand the appeal — one less thing to carry. But I've watched too many beginners miss their timing window by a critical half-second while their phone screen wakes up or their thumb finds the right spot. For the first 8 weeks especially, when you're building the foundational click-means-reward association, a dedicated physical clicker is worth it every time.
Clicker Options for Sound-Sensitive and Anxious Dogs
If your dog startles at loud noises, flinches at sudden sounds, or has any history of noise anxiety, a standard box clicker may create more problems than it solves. A button clicker held against your thigh or even inside a pocket can muffle the sound further. Some trainers use a retractable ballpoint pen click as a temporary bridge — the principle is identical, the sound is softer.
The key thing to remember: the sound itself isn't magic. It's the consistent pairing of that sound with a reward that creates the marker. If you need to start quieter to keep your dog comfortable and engaged, do that.
Treats: Small, Soft, and Gone in Seconds
Your treats need to disappear fast. If your dog is still chewing when you're ready to mark the next behavior, your whole timing rhythm falls apart.
My top picks for high-value training treats:
- Zuke's Mini Naturals — pea-sized, soft, and dogs go reliably nuts for them
- Cooked chicken breast, cut into pea-sized pieces the night before a session
- Bil-Jac Soft Training Treats — easy to break into smaller pieces on the fly
Avoid large biscuits, anything hard-baked, or dental chews. If it takes more than 2–3 seconds to eat, it's slowing your training down.
How to Set Up Your Training Space for Success
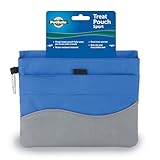
Here's a mistake I made embarrassingly late in my career: I spent my first year holding treats loosely in my fist, which meant my reward delivery was consistently 2–3 seconds slower than it needed to be. A simple treat pouch clipped to your waistband changes everything. Your hand is free, your dog isn't fixating on a closed fist, and you can deliver a treat within a second of clicking.
Beyond the pouch, a few other things genuinely help:
- A 6-foot leash for early sessions where you need gentle management
- A non-slip mat so your dog isn't skating around on hardwood floors trying to sit
- A small training journal — even just noting the date, what you worked on, and how many repetitions you completed gives you data to build on
You don't need a fancy setup. A quiet corner of a room, 10 minutes, and these basic tools is all it takes to start building something real.
Step One: Loading the Clicker (Charging the Mark)
Before your dog can learn a single command with a clicker, you need to complete one foundational step that most beginners skip or rush: charging the mark. This is the process of teaching your dog that the click sound means a treat is coming — every single time, without exception. Think of it as installing software before you can run any programs. Skip this step, and the clicker is just a weird noise in your hand.
For most dogs, this process takes one 5-minute session. Occasionally two. That's it.
The Exact Protocol for Charging the Clicker
Find a quiet room — your living room with the TV off, a bedroom, anywhere low-distraction. Sit down with your dog, a
in one hand, and a small pile of high-value treats nearby. Now do absolutely nothing except this:
- Click once
- Deliver a treat within 1–2 seconds
- Wait a few seconds
- Repeat
Do this 15–20 times. That's the entire session.
Here's what trips up nearly every beginner: your dog does nothing to earn the treat. You're not asking for a sit. You're not waiting for eye contact. You're not rewarding any behavior at all. The click happens, the treat appears — full stop. This feels deeply wrong to people. I've had clients say, "But I'm just giving food away for free." Yes. Exactly. That's the point right now.
The click needs to become a conditioned reinforcer — a sound that carries meaning entirely on its own, independent of anything your dog does. You can't shortcut this.
How to Know the Clicker Is Loaded
Watch for what I call the lightbulb moment. Your dog is sniffing the floor, distracted by something across the room, mid-stretch — and you click. Their head snaps toward you instantly. Not slowly. Not after a pause. Instantly.
That head snap is your dog's brain making the connection: that sound means something good just happened. When I worked with a four-year-old Beagle named Rupert who had zero prior training, it took exactly 17 repetitions before his head whipped around mid-sniff at the baseboards. His owner laughed out loud. That reaction is the green light to start teaching actual behaviors.
The Sequencing Mistake That Undermines Everything
The single most common error I see — constantly — is owners clicking and treating at the same time, or worse, producing the treat first and clicking as they hand it over. The sequence is non-negotiable: click first, treat second.
The click is a promise. It tells your dog that a reward is on its way because of what they just did. If you reverse it or blur the two together, the click loses its predictive power, and you're back to just being a person waving food around. Keep the treat hidden until after the click lands.
One more rule worth cementing now: never use the clicker to get your dog's attention. The click marks a behavior that already happened — it is not a recall cue, not a way to interrupt zoomies, not a noise to make your dog look at you. Misusing it this way confuses the association you've just worked to build.
Troubleshooting: What If My Dog Doesn't Seem to Care About the Click?
Some dogs, particularly anxious ones or those who've never been food-motivated in training contexts, seem unfazed at first. Before assuming the method won't work, check these things:
- Is your dog actually hungry? Train before meals, not after
- Are your treats valuable enough? Dry kibble won't cut it here — try small pieces of real chicken, cheese, or
with strong aroma
– **Is the environment too distracting?** Even a backyard can have too much going on during this first step
Adjusting Treat Value During the Charging Process
If you're 10 repetitions in and your dog seems mildly interested at best, upgrade your treat immediately. This isn't bribery — it's calibration. The charging process relies on your dog feeling genuine excitement when the click arrives. A lukewarm response means the treat isn't reinforcing enough in that moment. Switch to something smellier, softer, and more novel. You can always fade to lower-value rewards later once the association is solid.
Your First 5 Commands to Teach with the Clicker
Here's something I tell every new client before their first session: your first successful click-and-sit moment will change how you see your dog. Suddenly you're not wrestling with an unruly animal — you're having a conversation. That shift in perspective is real, and it happens faster than most people expect.
Keep your
small (pea-sized), smelly, and within easy reach. A
clipped to your waistband means you’re never fumbling at the critical moment of delivery.
Teaching 'Sit': Full Step-by-Step Luring Protocol
Sit is your starting point for one specific reason: dogs naturally sit dozens of times a day. That makes it easy to capture, easy to lure, and almost impossible to fail at — which matters enormously when you're still getting comfortable with your clicker timing.
The luring protocol:
- Hold a treat directly at your dog's nose so they can smell it
- Slowly arc your hand up and back over their head, moving toward their tail
- As their nose follows the treat upward, their rear will naturally lower toward the floor
- Click the exact instant their rear touches the floor — not halfway down, not after they've settled
- Deliver the treat immediately after the click
Most dogs get this within 3–5 repetitions. One of my clients, a first-time dog owner with a chaotic 9-month-old Labrador named Duke, looked genuinely stunned when Duke sat on the second attempt. "He's never done anything I've asked," she said. That's the lure working with the dog's natural movement, not against it.
A critical note on verbal cues: don't say "sit" yet. Add the spoken word only after your dog is completing the behavior reliably — roughly 8 out of 10 attempts. If you attach the word too early, it becomes background noise before the dog understands what it means.
Plan to transition away from luring within two weeks. Start capturing — clicking naturally occurring sits during the day — to prevent your dog from learning that the only time sitting pays off is when your hand is moving over their head.
Teaching 'Down': Why This Is Harder Than Sit and How to Break Through
Down is harder because it's a more vulnerable posture for dogs. Many dogs, especially confident or anxious ones, resist going all the way to the floor.
Start from a sit. Hold the treat at your dog's nose and draw it slowly straight down toward the ground between their front paws, then pull it slightly forward along the floor. You're looking for elbows touching the floor — that's your click point.
If your dog keeps popping back up instead of following all the way down, try working on a slightly elevated surface like a low step. The natural lean forward often unlocks the down position. Shaping partial behaviors — clicking for just a lowered head first, then elbows at 45 degrees, then full down — is also highly effective here.
Teaching 'Stay': Building Duration, Distance, and Distraction Separately
Never work duration, distance, and distraction at the same time. This is one of the most common mistakes I see, and one of the easiest to fix once you understand the rule.
Start with duration only: ask for sit, wait one second, click and treat. Gradually extend to 3 seconds, 5 seconds, 10 seconds — only increasing when your dog succeeds 4 out of 5 attempts at the current level. Once you have solid duration, add one step of distance. Distractions come last, and they should be introduced gently: a toy on the floor nearby, then someone walking past.
Teaching 'Come': The Most Important Recall Foundation You'll Ever Build
A reliable recall is a genuine safety skill, and I treat it that way in every session.
Start indoors with zero distractions. Say your dog's name followed by "come," then immediately crouch down and act excited — clap, make noise, whatever your dog finds irresistible. The instant they reach you, click and deliver the best treat you have. Coming to you must always predict something wonderful.
Never call your dog to you for anything they find unpleasant — baths, nail trims, ending playtime. If you need to do those things, go get them instead. Poisoning the recall cue is easy to do and genuinely difficult to undo.
A Word on Session Length
Keep every session to 3–5 minutes maximum, 2–3 times per day. I've watched owners run 45-minute training marathons and then wonder why their dog starts sniffing the ground and wandering off. That's mental fatigue — it looks like stubbornness but it's exhaustion. Short, successful sessions build a dog who is excited to train, not one who dreads it.
Timing, Rate of Reinforcement, and the Most Common Beginner Mistakes
If loading the clicker is the foundation, timing is the architecture. Everything else in a training session can be right — great treats, calm environment, enthusiastic dog — and poor timing will still undermine all of it. This is where most beginners struggle, and honestly, where I made my biggest early mistakes too.
Half a second matters more than you think. Dogs learn through immediate consequence. When you click, your dog's brain tags whatever behavior just occurred as the thing that earned the reward. Click even 500 milliseconds late — as your dog rises from a sit — and you've just clicked "beginning to stand." Do that three sessions in a row and you'll have a dog who sits briefly, pops up quickly, and looks at you expectantly. I've seen this exact pattern in dozens of dogs whose owners were baffled about why their sit was deteriorating.
How to Practice Your Clicker Timing Before Training Your Dog
I tell every new client to practice their clicker timing on the TV before they train their dog once. Pick any sports broadcast — basketball works perfectly — and click every time the ball hits the floor. You'll immediately feel how your reaction lags behind the event. That lag is what your dog experiences when your timing is off.
Another drill I recommend: bounce a
Similar Posts
Doberman Pinscher Obedience Training: Essential Basics
Introduction If you've ever watched a Doberman Pinscher move with precision through an obedience course or respond instantly to their handler's commands, you've witnessed what this breed was born to do. These athletic, intelligent dogs don't just tolerate training—they genuinely thrive on it. But here's the truth: without proper obedience training, that impressive intelligence and…
5 Minute Dog Training Sessions: Benefits & Why They Work
Introduction: Why Short Training Sessions Transform Your Dog's Learning I'll never forget the day a client came to me, nearly in tears, because her intelligent Border Collie had started walking away during training sessions. "We practice for 45 minutes every evening," she explained. "Why won't he cooperate anymore?" The problem wasn't her dog's intelligence or…
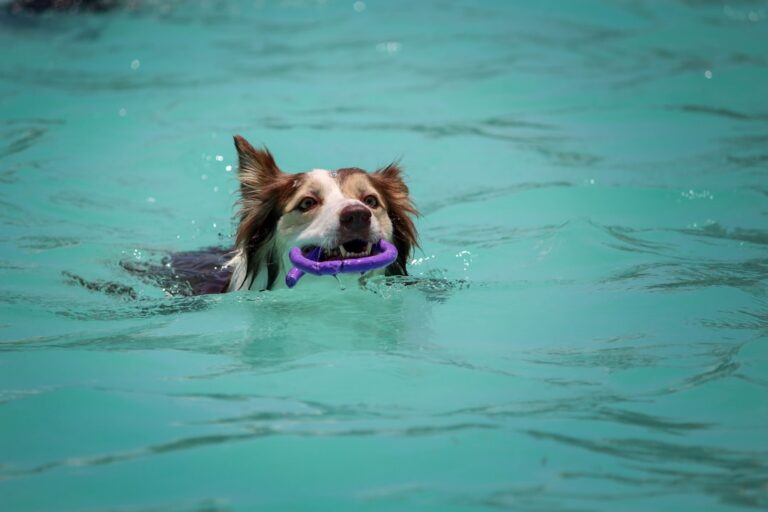
How to Train Your Dog to Swim Safely: Expert Guide 2026
Introduction Picture this: you're at the lake on a beautiful summer day, and your excited dog leaps off the dock—only to panic and thrash in the water. It's a terrifying moment that catches many dog owners off guard. Here's the truth that surprises most people: not all dogs are natural swimmers. Despite what popular culture…