How to Train Your Dog to Accept Ear Cleaning (Step-by-Step)
Introduction
Picture this: You approach your dog with ear cleaning supplies in hand, and they immediately bolt under the bed. Or perhaps they tolerate it—barely—with trembling, whale eyes, and a look that says "I'll never forgive you for this." Sound familiar? You're not alone. Many dog owners struggle to clean their dog's ears because somewhere along the line, their pup learned that ear cleaning equals discomfort, restraint, or unpleasant surprises.
Here's why this matters more than you might think: Dogs with floppy ears, allergies, or who love swimming need regular ear cleaning to prevent painful infections. When your dog fights you every step of the way, cleanings become infrequent, rushed, and stressful for both of you. You might skip them altogether, putting your dog at risk for ear infections that can lead to chronic pain, hearing loss, or costly vet bills. A dog who accepts—or even enjoys—ear handling lets you catch problems early and maintain their health without drama.
A Better Way Forward
The good news? You don't need to wrestle, pin, or force your dog through this process. The approach I'll teach you builds on positive reinforcement and systematic desensitization—fancy terms for a simple concept: We'll help your dog form new, positive associations with ear handling through gradual exposure and rewards. Instead of "holding them down and getting it over with," you'll build genuine cooperation and trust.
Think of it like teaching a child to enjoy bath time. You wouldn't suddenly dump water over their head and wonder why they're terrified. You'd start with fun splashing, work up to gentle water play, and make the whole experience rewarding. Your dog deserves the same patient approach.
What You'll Learn
In this guide, I'll walk you through:
- Step-by-step desensitization exercises that start with simply touching your dog's ears and gradually progress to full cleaning sessions
- How to identify and work through resistance without backsliding or creating new fears
- Strategies for maintaining cooperation once you've achieved success, so cleanings stay stress-free long-term
- Real-world troubleshooting for dogs who've had bad experiences or have particularly sensitive ears

Check Price on Amazon →
Set Realistic Expectations
I won't sugarcoat this: Building positive associations with ear cleaning takes time. Depending on your dog's history and sensitivity level, expect this process to take 2-6 weeks of consistent practice. Dogs with previous negative experiences may need more time, while puppies or dogs with only mild aversion might progress faster.
You'll practice for just 2-5 minutes daily—short sessions prevent frustration and keep training positive. Yes, it requires patience. But compare a few weeks of training to years of stressful wrestling matches, and the investment becomes obvious. Let's get started building a dog who actually cooperates—maybe even wags—during ear cleaning time.
Understanding Why Dogs Resist Ear Cleaning
If your dog dodges you the moment they see the ear cleaning bottle, you're not alone. Ear cleaning resistance is one of the most common grooming challenges dog owners face—and for good reason. Understanding why your dog resists is the first step toward changing their response.
The Psychology Behind Ear Touch Sensitivity
Your dog's ears are incredibly sensitive structures packed with nerve endings. Think of them as similar to your own ears, but amplified. Dogs rely on their ears not just for hearing, but for balance and communication, making them instinctively protective of this vulnerable area.
From an evolutionary standpoint, dogs are hardwired to guard their heads, ears, and throats—these are survival zones. When you reach for your dog's ears, you're asking them to override a powerful natural instinct. Add to this the fact that ear infections or mites may have already caused pain, and you've got a dog who's learned that ear touching = discomfort.
Previous negative experiences create the strongest associations. Even one painful ear infection or a too-vigorous cleaning can program your dog to anticipate trouble. I've worked with dogs who panic at the mere sight of a cotton ball because someone once probed too deeply or held them down forcibly during a cleaning session.
The sensations involved in ear cleaning also trigger fear responses:
- Cold liquid suddenly trickling into the ear canal
- The squishing, gurgling sounds as solution moves around
- Being physically restrained or having their head held still
- The unfamiliar smell of cleaning solutions
Common Mistakes That Increase Resistance
Many well-intentioned owners accidentally make ear cleaning more stressful. The biggest mistake? Treating it like a wrestling match. When you hold your dog down or chase them around the house with the cleaning solution, you're confirming their worst fears.
Another common error is diving straight into the deep ear canal before your dog is comfortable with basic ear touching. It's like going to the dentist who immediately starts drilling without building any trust first.
Breed-specific considerations matter too. Floppy-eared breeds like Cocker Spaniels and Basset Hounds typically need more frequent cleanings, which means more opportunities for negative associations to form. They're also prone to ear infections, so they may already have painful memories connected to ear handling. Dogs with erect ears, like German Shepherds, often resist less because their ears naturally ventilate better and require less intervention—meaning less practice tolerating the process.
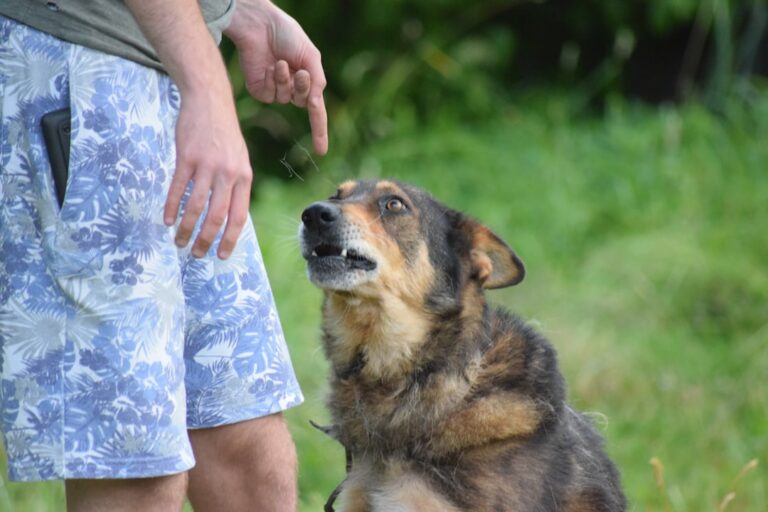
Learn to read your dog's stress signals before they escalate:
- Whale eye (showing the whites of their eyes)
- Excessive lip licking or yawning
- Freezing in place or becoming suddenly "heavy"
- Turning their head away or tucking it against their body
- Attempting to back away or leave the area

Check Price on Amazon →
When you spot these signals, you're already pushing too far. The key is working below this threshold, which we'll cover in the training steps ahead. Remember: your dog isn't being stubborn or difficult—they're communicating genuine discomfort that deserves respect and patience.
Preparing for Success: What You'll Need
Before you touch your dog's ears, setting yourself up with the right supplies and environment makes all the difference. Think of this as assembling your toolkit before starting any important project—except this project involves a potentially wiggly, nervous dog who needs to learn that ear cleaning isn't scary.
Treat Selection for Counter-Conditioning
This isn't the time for your dog's regular kibble or standard training treats. You need the good stuff—what I call "birthday party treats" that your dog would do backflips for. We're creating positive associations with something your dog naturally finds uncomfortable, so the rewards need to match the challenge.
Consider these high-value options:
- Small pieces of real cheese (cheddar, mozzarella, or string cheese work great)
- Cooked chicken breast cut into pea-sized pieces
- Freeze-dried liver or other single-ingredient freeze-dried meats
- Hot dog slices (use sparingly due to sodium content)
- Cooked turkey or roast beef from the deli counter
Check Price on Amazon →
The key is choosing something your dog doesn't get during regular training sessions. Keep pieces small—about the size of a pea—so you can reward frequently without filling up your dog's stomach. You'll go through quite a few treats during early sessions.
I also recommend keeping treats in a
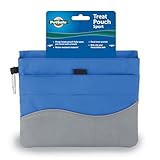
Check Price on Amazon →
attached to your waist. This keeps your hands free and rewards instantly accessible, which is crucial for marking the exact moment your dog does something right.
Setting Up Your Training Space
Location matters more than you might think. Choose a quiet room where your dog already feels comfortable—maybe your living room or bedroom. Avoid spaces your dog associates with stress, like where bath time happens.
Your ideal setup includes:
- Non-slip surface: Use a yoga mat, bathroom rug, or towel so your dog doesn't slide around. A secure footing helps dogs feel safer.
- Good lighting: You need to see what you're doing, and bright-but-not-harsh lighting reduces the mysterious factor for your dog.
- Low distractions: Turn off the TV, put your phone on silent, and choose a time when the house is calm.
- Easy exit: Don't corner your dog or block their escape route. They should never feel trapped.
Essential supplies to have within reach:
- Veterinarian-approved ear cleaning solution (warmed to room temperature—cold liquid is startling)
- Cotton balls or gauze pads (never Q-tips, which can damage the ear canal)
- Several towels for your lap and potential mess
- Your high-value treats
- A helper if available (especially useful for the first 2-3 sessions)
About that helper: Having another person your dog trusts can be invaluable initially. They can feed treats steadily while you handle the ears, creating a positive "treat dispenser" association. However, make sure your helper understands they're not there to restrain your dog—only to reward. If your dog wants to leave, let them. Forcing the issue destroys trust and sets your training back significantly.
Keep everything organized and within arm's reach before bringing your dog into the space. Fumbling for supplies mid-session breaks the positive momentum you're building.
Phase 1: Desensitizing Your Dog to Ear Touches
The foundation of successful ear cleaning is teaching your dog that having their ears handled is no big deal—or even something to look forward to. This phase is all about patience and positive associations, not rushing to get actual cleaning done.
Step-by-Step Ear Touch Protocol
Start where your dog is comfortable, not where you want them to be. For many dogs, that means beginning with general head and face touches before you ever approach the ears.
Week 1: Building General Comfort
- Touch your dog's head or cheek for one second, then immediately deliver a treat
- Repeat 5-10 times per session
- Keep treats small but high-value (think small pieces of chicken, cheese, or
Check Price on Amazon →
)
– The sequence matters: touch first, *then* treat (not simultaneously)
Week 2: Approaching the Ears
- Progress to touching near the ear base, still just for one second
- Touch the outer edge of the ear flap with one finger
- Continue the touch-and-treat pattern
- Vary which ear you touch to keep things balanced
Week 3: Ear Flap Handling
- Gently lift the ear flap for 1-2 seconds
- Hold the ear between your thumb and finger
- Touch different parts of the outer ear
- Gradually extend duration to 5 seconds, then 10-15 seconds
The key is making each touch brief enough that your dog doesn't have time to worry about it. You're teaching them that ear touches predict something wonderful.
Recognizing When to Progress vs. Stay at Current Level
Your dog will tell you whether you're moving at the right pace—you just need to know what to look for.
Green Light Signs (Ready to Progress):
- Relaxed body posture when you approach
- Soft, blinking eyes
- Leaning into your touch or staying still voluntarily
- Looking for the next treat with interest
- Wagging tail or neutral tail position
Red Light Signs (Stay at Current Level or Go Back a Step):
- Head turning or pulling away
- Tense facial muscles or a hard stare
- Pinned-back ears (ironic, I know!)
- Lip licking, yawning, or panting when not warm
- Attempting to leave the area
If you see stress signals, you've moved too fast. That's okay! Simply go back to the previous step where your dog was comfortable and spend more time there. There's no trophy for speed in training.
Troubleshooting: What to Do if Your Dog Won't Accept Touch
If your dog pulls away immediately: Start even simpler. Reward them just for letting you move your hand toward their head. Build up over several sessions before actually making contact.
If your dog seems shut down or disinterested in treats: The environment might be too stressful, or your treats aren't valuable enough. Try training in a quieter room, use better rewards, or work after a walk when your dog is slightly tired but not exhausted.
If one ear is more sensitive than the other: Your dog may have discomfort or a past negative experience with that ear. Focus on the "good" ear while building confidence, but have your vet check the sensitive ear to rule out infection or pain.
Practice Schedule: Aim for 2-3 sessions daily, keeping each one to just 3-5 minutes. Short and sweet beats long and stressful every time. This phase typically takes 2-4 weeks, depending on your dog's history and sensitivity level. Remember: time invested now means easier ear cleanings for the next decade of your dog's life.

Check Price on Amazon →
Phase 2: Introducing Ear Examination and Manipulation
Now that your dog is comfortable with ear touches, it's time to simulate the actual ear cleaning process. This phase requires patience—rushing here often means starting over, so take your time building positive associations.
Teaching the Cooperative Chin Rest
The chin rest is a game-changer for ear cleaning and other husbandry tasks. When your dog voluntarily places their chin in your hand or on a surface, they're actively choosing to participate rather than simply tolerating handling.
Start by holding your flat palm out and marking with "yes!" whenever your dog's chin touches it. Reward immediately. Once they understand the behavior, add your cue word like "chin" or "rest." Gradually increase duration—first one second, then three, then five. Practice this behavior until your dog can hold a steady chin rest for 15-20 seconds.
Check Price on Amazon →
Once reliable, incorporate ear touching during the chin rest. While your dog maintains the position, gently touch one ear, reward, and release. If they break the chin rest, that's valuable information—you've moved too fast. A proper chin rest gives your dog a clear way to say "I need a break" by simply lifting their head.
Building Tolerance for Ear Flap Manipulation
Begin by lifting the ear flap just slightly while continuously feeding high-value treats—small pieces every 1-2 seconds. Think chicken, cheese, or freeze-dried liver, not regular kibble. You want your dog thinking "This is amazing!" not "This is tolerable."
Here's the critical part: the treats continue as long as you're touching the ear. When you release the ear, the treats stop. This creates a powerful association: ear handling = food appears, no ear handling = food disappears.
Progress through these steps:
- Lift the ear flap and immediately release (2-3 seconds)
- Hold the ear flap open while looking inside briefly (5 seconds)
- Hold the ear in cleaning position—flap lifted and slightly pulled back (10 seconds)
- Gently manipulate the ear as if cleaning, without any products (15 seconds)
If your dog pulls away, tenses, or shows stress signals (whale eye, lip licking, yawning), you've pushed too hard. Drop back to an easier step.
Working with Both Ears Equally
Don't fall into the trap of only practicing with the "easy" ear. Many dogs have a preference, but ear infections don't discriminate. Alternate which ear you work with during each session, and keep detailed mental notes about which ear needs more practice.
Some dogs are more sensitive about their ears when approached from certain angles. Experiment with positioning—some dogs prefer you sitting beside them rather than hovering over them. Others do better standing rather than lying down initially.
Adding Duration Gradually
Use the "three-second rule": if your dog stays relaxed at five seconds, practice that level three separate times before extending to eight seconds. This systematic approach prevents the frustration of constantly backsliding. Remember, we're building a foundation that will last your dog's lifetime—an extra week of training now saves years of struggling with ear care.
Phase 3: Desensitizing to Cleaning Tools and Solutions
Now that your dog is comfortable with ear handling, it's time to introduce the actual cleaning equipment. This phase requires patience—rushing here is the number one reason dogs develop lifelong aversions to ear cleaning.
Making Ear Cleaner Solution Less Scary
Start by simply placing the ear cleaning bottle on the floor near your dog during treat time. Let them investigate it if they're curious, then reward. Do this for 2-3 sessions until the bottle becomes boring background furniture.
Next, pick up the bottle while your dog watches, immediately give a treat, then put it down. Repeat 5-10 times. Your dog should start looking at you expectantly when you touch the bottle—that's the conditioned response we want.
The squirting sound freaks out many dogs, so desensitize it separately. Hold the bottle behind your back or off to the side, squirt it into a towel (away from your dog), and immediately toss a treat. Gradually bring the bottle closer to your dog's visual field over multiple sessions, always pairing the squirt sound with something good.
Check Price on Amazon →
Pro tip: Warm the cleaning solution to room temperature before training sessions. Cold liquid in the ear canal is startling and can undo weeks of work.
Cotton Ball Desensitization Protocol
Cotton balls are soft, but they're still unfamiliar objects approaching your dog's sensitive areas. Start this process with completely dry cotton balls:
- Touch the cotton ball to your dog's shoulder, treat
- Touch it to their neck, treat
- Touch it to their cheek, treat
- Touch it to the base of their ear flap, treat
- Gently touch the inside of the ear flap (not the canal), jackpot with multiple treats
Repeat this sequence over 3-4 sessions until your dog remains relaxed throughout. If your dog pulls away at any point, you've moved too fast—go back two steps.
Practice Runs Without Actual Cleaning
This is where everything comes together. You're going to simulate the entire cleaning process without actually cleaning deeply:
Week 1-2: Lift the ear flap, hold the bottle near (but don't squirt), touch the outer ear with a dry cotton ball, release, and reward heavily. Do this 2-3 times per ear, once daily.
Week 3: Lift the ear flap, apply 1-2 drops of room-temperature solution to only the visible outer ear (not into the canal), gently dab with cotton ball, reward. The key word is outer—we're not doing full cleaning yet.
Week 4: Gradually work toward the complete process: lift ear, apply solution to the canal entrance, massage the base of the ear for 2-3 seconds, let your dog shake, gently wipe the outer area. Treat after each step initially, then after every few steps as your dog grows confident.
Check Price on Amazon →
Throughout this phase, watch your dog's body language. Tense muscles, whale eye (showing whites of eyes), or pulling away means slow down. Soft eyes, loose body, and staying in position means you're progressing at the right pace.
If your dog seems overwhelmed, end the session on an easier step they can succeed at, then try again tomorrow.
Phase 4: Performing the First Real Ear Cleaning
You've done the groundwork—your dog accepts ear touches, doesn't flinch at the bottle, and associates ear handling with good things. Now it's time for the actual cleaning, and getting this first experience right sets the tone for every future session.
The Complete Ear Cleaning Procedure with Treat Integration
Choose a moment when your dog is naturally calm—after a walk or play session works perfectly. You'll need plenty of time without rushing, so weekends often work better than hectic mornings.
Have your
Check Price on Amazon →
ready with high-value rewards. Here’s the step-by-step process:
Before you start: Give your dog a treat just for sitting calmly near you. Create that positive expectation.
Apply the solution: Lift the ear flap gently (treat!), insert the nozzle tip just inside the ear canal, and squeeze in the recommended amount of
Check Price on Amazon →
. Immediately reward with a treat as you release the ear.
Massage the base: This is crucial—gently massage the base of the ear for 20-30 seconds. You'll hear a squelching sound, which means you're distributing the cleaner properly. Talk soothingly and offer another treat mid-massage. Don't worry if your dog seems confused by the sensation; that's normal.
The release: Give a final treat, then step back slightly and say "okay" or "shake." This gives your dog permission to do what they naturally want to do next.
Managing the Head Shake Phase
Here's where many owners panic, but the head shake is actually helpful—it brings debris up and out of the ear canal. After you've massaged the ear and stepped back, your dog will likely shake their head vigorously. This is exactly what should happen.
The key is managing your expectations: yes, ear cleaning solution will fly everywhere. Work in an easy-to-clean area like a bathroom or laundry room, or outside if weather permits. Some trainers wear old clothes for this reason.
Don't restrain your dog during the shake—that creates negative associations. Instead, let them shake freely, then immediately call them back for another treat. You're teaching them that shaking is part of the process, not something to fear.
After the shake: Use a soft cotton ball or gauze to gently wipe the outer ear and visible part of the canal. Never push deep into the ear. Treat after every few wipes.
Post-Cleaning Celebration Routine
This is non-negotiable: end with something your dog loves. Not just a treat—a genuine celebration. Play a quick game of tug, toss a ball a few times, or break out a special toy they only get occasionally. Make this "ear cleaning equals party time" connection strong.
For the first session, one ear may be plenty. If your dog seems stressed or you're running low on cooperation, stop after one ear. You can tackle the second ear later that day or the next day. Two successful one-ear cleanings beat one stressful two-ear session every time.
As you repeat cleanings every few weeks, maintain this positive structure. Dogs have excellent memories—if ear cleaning consistently predicts good things, they'll learn to tolerate or even welcome it. Some of my clients report their dogs now run toward them when they see the ear cleaner bottle. That's the power of positive associations done right.
Troubleshooting Common Training Challenges
Even with the best approach, you'll likely hit a few bumps in the road. Here's how to handle the most common challenges and keep your training on track.
Dog pulls away or tries to escape: This is your dog's way of saying you've moved too fast. Don't take it personally—it happens to everyone. Simply go back two or three steps in your training progression. If your dog is escaping when you touch the ear, return to just rewarding proximity to the ear without touching. Spend a few more days at each level before advancing. Remember, there's no prize for speed here.
Progress has stalled: When your dog seems stuck at a particular step, try these strategies:
- Switch to higher-value treats. If you're using kibble, upgrade to small pieces of chicken or cheese
- Shorten your training sessions to 2-3 minutes instead of 5
- Train when your dog is slightly hungry, not right after meals
- Check that your hands are warm—cold fingers on ears feel unpleasant
Check Price on Amazon →
Sometimes a stall means there's underlying discomfort you haven't noticed. Run your fingers gently around the ear base and watch your dog's reaction carefully.
One ear accepts cleaning but not the other: This is a red flag. If your dog consistently resists one ear while accepting the other, there's likely a physical reason. Don't push through this—you need a vet visit to rule out infection, injury, or ear mites.
Regression after successful training: You've achieved success, then suddenly your dog won't cooperate anymore. This happens when we stop reinforcing the behavior. Ear cleaning isn't self-rewarding for dogs, so you need to maintain the treat association indefinitely. Even with a fully trained dog, continue offering treats during and after cleaning sessions.
When to Consult Your Veterinarian
Schedule a vet appointment if you notice:
- Head shaking or tilting
- Foul odor from the ear
- Discharge (especially if dark brown or yellow)
- Redness or swelling inside the ear
- Your dog yelping when you touch a specific area
- Sudden resistance after previously accepting ear handling
Signs Your Dog May Have Ear Pain or Infection
Pain changes everything. A dog experiencing ear discomfort can't focus on training, and pushing forward will only create negative associations. Watch for scratching at the ears, rubbing the head on furniture, or sensitivity to having their head touched. Dogs with ear infections often hold the affected ear slightly lower or back.
Working with a Professional Trainer or Behaviorist
Showing aggression (growling, snapping): Stop training immediately and consult a professional. Aggression during ear handling could indicate pain, past trauma, or a developing behavioral issue. Don't attempt to "work through it" on your own—this is genuinely dangerous and requires expert guidance.
Working with extremely fearful or previously traumatized dogs: If your dog has severe anxiety or a history of abuse, expect this process to take months, not weeks. A qualified professional can create a customized behavior modification plan and may suggest using
Check Price on Amazon →
during sessions to create positive associations. Some dogs benefit from working with a veterinary behaviorist who can prescribe anxiety medication if needed, making training actually possible rather than traumatic.
Maintaining Long-Term Cooperation and Prevention Tips
The real secret to stress-free ear cleaning isn't just nailing the initial training—it's maintaining that positive association for years to come. Many owners make the mistake of abandoning rewards once their dog tolerates cleaning, only to find cooperation crumbling months later.
Creating a Sustainable Ear Care Routine
Keep rewarding indefinitely. Even after your dog handles ear cleaning like a champ, continue offering treats and praise during and after each session. Think of it as paying your dog for their cooperation—the paycheck shouldn't stop just because they've mastered the job. I still reward my own dogs for ear cleaning after a decade of cooperation, and they practically run to me when they see the ear cleaner bottle.
Practice handling between cleanings. Don't only touch your dog's ears when you're about to clean them. Several times a week, gently lift and examine their ears during regular petting sessions, always following up with something positive. This prevents your dog from thinking "ear touch equals cleaning time" and keeps them comfortable with the sensation.
Check Price on Amazon →
Establish consistency in your routine. Dogs thrive on predictability. Schedule ear cleaning for the same general time—maybe Saturday mornings after breakfast, or every other Thursday evening. Use the same sequence of events: same location, same position, same reward pattern. This predictability reduces anxiety and helps your dog mentally prepare.
Preventing Ear Problems That Make Cleaning Difficult
Prevention truly is easier than cure. When ears are healthy and comfortable, cleaning remains a simple maintenance task rather than a medical intervention.
Keep those ears dry. After swimming or baths, gently dry the ear flaps and consider using a veterinarian-recommended drying solution for floppy-eared breeds. Moisture creates the perfect environment for yeast and bacteria, turning a simple cleaning into a painful ordeal.
Conduct weekly check-ins. Lift those ear flaps once a week and look for redness, unusual odor, discharge, or excessive wax buildup. Catching problems early means addressing them before they become painful. A dog with a mild ear issue might still tolerate cleaning; one with a raging infection will remember that pain and resist future sessions.
Know your breed's needs. Cocker Spaniels, Basset Hounds, and other long-eared breeds need more frequent attention than prick-eared German Shepherds. Hairy-eared breeds like Poodles benefit from regular professional grooming to remove excess ear canal hair.
Teach kids the right approach. If children will help with ear care, supervise closely and teach them to move slowly, speak softly, and always reward the dog. Rough handling from an excited child can undo months of careful training.
Watch for regression signals. If your previously cooperative dog starts pulling away, shaking their head more, or showing stress signals during cleaning, don't push through it. Stop, assess whether there's an underlying ear problem, and return to earlier training steps if needed. A few refresher sessions with high-value rewards can restore cooperation before resistance becomes a habit.
Frequently Asked Questions
How long does it take to train a dog to accept ear cleaning?
Most dogs require 2-6 weeks of consistent training depending on their starting fear level. Extremely fearful dogs or those with traumatic experiences may need 2-3 months. Training proceeds faster with daily short sessions (5 minutes) rather than weekly long ones. Success depends on never forcing or rushing the process.
Can I train an older dog to accept ear cleaning, or is it too late?
Dogs of any age can learn to accept ear cleaning through positive reinforcement. Older dogs may actually be calmer and easier to train than energetic puppies. Senior dogs may take slightly longer if they have years of negative associations. The same gradual desensitization process works regardless of age. Be extra gentle with senior dogs who may have arthritis or other age-related sensitivities.
What treats work best for ear cleaning training?
Use 'high-value' treats your dog rarely gets: small pieces of cheese, chicken, hot dogs, or freeze-dried meat. Treats should be tiny (pea-sized) so you can reward frequently without overfeeding. Some dogs respond better to squeeze tubes of baby food, peanut butter, or wet dog food. Reserve the absolute best treats exclusively for ear handling to create maximum positive association. Avoid using regular kibble or biscuits—they're not motivating enough for this challenging task.
My dog growls when I touch their ears. Is this dangerous and what should I do?
Growling is a warning sign that should never be ignored or punished. First, have your veterinarian examine the ears—pain from infection is a common cause. If medically cleared, the growling indicates serious fear or previous trauma requiring professional help. Never force a dog who shows aggression around ear handling—this can escalate to biting. Contact a certified professional dog trainer or veterinary behaviorist for one-on-one guidance. With proper help, most dogs can overcome this fear, but it requires expert assessment.
How often should I practice ear cleaning training versus actually cleaning the ears?
Practice desensitization exercises daily (2-3 times) during the training period. Actual cleaning frequency depends on your dog's breed and ear health (typically weekly to monthly). Continue brief practice sessions between real cleanings to maintain cooperation. Always reward cooperation during actual cleanings just as generously as during training. If your dog needs frequent medical ear cleaning, work with your vet on an accelerated training protocol.