Free Shaping Dog Training: The Complete 2026 Guide
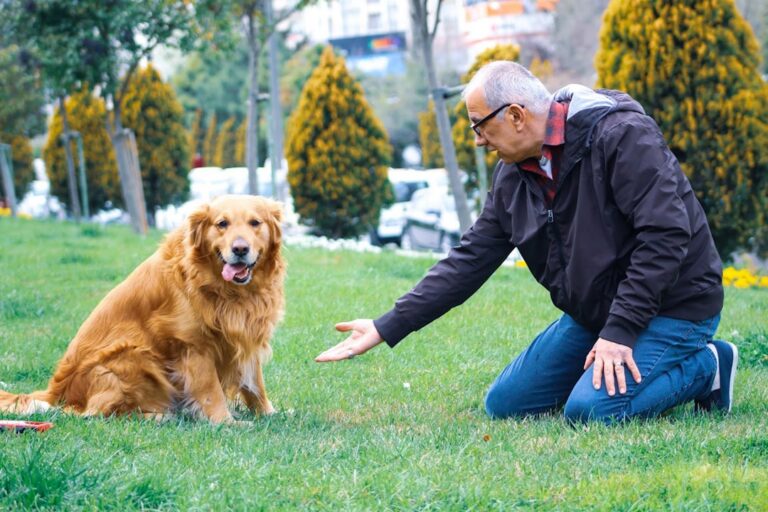
Most dog trainers — myself included, early in my career — spend years teaching dogs what to do. We lure, we prompt, we guide paws into position. It works, mostly. But there's a method that flips the entire relationship on its head, and the first time I watched a Border Collie figure out how to turn off a light switch entirely on his own, in under 12 minutes, without a single lure or verbal cue, I genuinely reconsidered everything I thought I knew about how dogs learn.
That method is free shaping, and it might be the most underused tool in modern dog training.
Free shaping asks your dog to think, experiment, and problem-solve while you sit back, clicker in hand, and reward tiny steps toward a behavior you haven't even hinted at yet. Done well, it produces dogs that are confident, creative, and almost eerily attentive to their owners. Done poorly — and I've made every mistake in the book — it produces a confused dog staring at you while you wonder what went wrong.
This guide covers everything you actually need to get started: the equipment, the mechanics, the mindset, and a complete first project that works reliably even for beginners. Whether you've never clicked a clicker or you've hit a frustrating plateau with your current training, you'll finish this knowing exactly how to run a productive free shaping session and why it's worth adding to your regular practice.
But before we talk technique, it helps to understand what makes free shaping genuinely different from everything else — because once you see the distinction, the rest falls into place naturally.
What Is Free Shaping and Why It's Different From Other Training Methods
The first time I used free shaping with a dog, I placed a cardboard box on the floor, sat down in a chair with my
and a handful of treats, and did absolutely nothing. I just waited. Within 90 seconds, a four-year-old Labrador named Biscuit — trained entirely through luring his whole life — glanced at the box, heard a click, and got a treat. You could see the exact moment something shifted behind his eyes. He looked at the box again. *Click, treat.* Then he took a step toward it. *Click, treat.* Nobody told him what to do. He was figuring it out himself, and he was *lit up* about it.
That session changed how I think about dog training.
Free shaping is a training method in which the dog independently offers behaviors without any luring, prompting, physical guidance, or pre-set cues from the handler. You are not showing the dog what to do. You are not placing a treat near a target to draw movement. You are not pushing, patting, or pointing. You simply wait for the dog to do something — anything — and you selectively reinforce the behaviors that inch closer to your goal.
How It Differs From Luring and Modeling
In lure-and-reward training, the handler uses food or a toy to guide the dog's body into position. It works well and it's not a bad method — I used it almost exclusively for the first eight years of my career. But the dog's role in that transaction is essentially passive: follow the food, get the food. The handler is the architect of every movement.
Modeling (sometimes called "molding") is even more handler-directed — you physically position the dog's body, then reward the end result. The dog is moved through the behavior rather than discovering it.
Free shaping flips this entirely. The dog becomes the architect of the session. The handler's job shrinks to observer and precise marker — nothing more. This distinction sounds subtle until you watch a dog work through it. Then it's obvious.
The Science Behind It
Free shaping is rooted in operant conditioning, specifically the systematic positive reinforcement of successive approximations — a concept developed by B.F. Skinner in the 1940s and 50s. The idea is that you can build any complex behavior by reinforcing small steps that progressively resemble the finished goal.
Applied animal trainer Bob Bailey and clicker training pioneer Karen Pryor brought this framework to companion and working animals, and their work remains the backbone of modern free shaping practice. The
is the tool that makes precise timing possible — it marks the exact moment a correct approximation occurs, before the dog has moved on to the next thing.
The mechanism is elegant: each click tells the dog that specific action paid off, which makes the dog more likely to repeat and expand on it. Over many repetitions, you're sculpting behavior from the inside out.
The 'Thinking Dog' Effect: How Free Shaping Changes Your Dog's Brain
After I started incorporating free shaping sessions — even just 5 minutes, two or three times a week — I noticed something I didn't expect. Dogs I worked with began approaching all training with more initiative. They offered behaviors faster. They recovered from mistakes more quickly. They seemed genuinely less stressed by novelty.
Research in canine cognition supports this observation. Dogs with experience in free shaping show faster acquisition of novel behaviors in follow-up training because they've developed what trainers call operant confidence — a learned expectation that their own actions cause good things to happen. This is qualitatively different from a dog who waits to be shown what to do.
Free Shaping vs. Capture Training — Understanding the Difference
These two methods are easy to conflate, but they're distinct. Capture training means you wait for a behavior to occur naturally in the dog's daily life — a spontaneous stretch, a yawn, a sit — and you mark and reward it. You're capturing something that already exists.
Free shaping, by contrast, involves a deliberate training session with a specific goal behavior in mind. You're not waiting days for a natural occurrence; you're actively working through a progression in real time. Both methods give the dog agency, but free shaping is systematic — it has a destination, and you're building the road one approximation at a time.
Essential Equipment and Setup Before Your First Free Shaping Session
Free shaping looks deceptively simple from the outside — dog moves, trainer clicks, dog gets a treat. But the equipment and environment drive the outcome more than most people expect. Get these fundamentals right before you ever introduce a prop, and you'll be miles ahead.
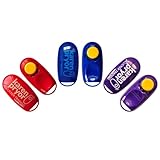
The Clicker: Your Most Important Tool
A mechanical box clicker or the
(I’ve used the Karen Pryor i-Click for years) will outperform any verbal marker for free shaping. In shaping, you’re often marking a behavior that lasts less than half a second — the moment one paw lifts toward a box, a head turn in the right direction, a single step. A verbal “yes” varies in pitch, volume, and timing depending on your excitement level. A click is always identical.
Think of the click as an event marker, not just a reward signal. It's saying "that exact thing you did at this exact millisecond — that's what earned the treat." That precision is what makes shaping work.
Before any shaping session, verify your dog is clicker-conditioned. If they're not, spend one day doing 20–30 charge repetitions: click once, deliver a treat, pause, repeat. No commands, no behaviors required. You're simply building the association. Do this in a calm room with zero distractions — it takes most dogs under 10 minutes to understand that a click means food is coming.
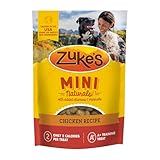
Treat Selection: Smaller and Faster Than You Think
Your treats need to meet one non-negotiable standard: your dog should be able to eat them in under 2 seconds. Anything that causes chewing — a larger biscuit, a piece of kibble that bounces under the couch — kills your rate of reinforcement, which is the engine that powers shaping.
My go-to options are Zuke's Mini Naturals or freeze-dried chicken liver broken into pea-sized pieces. The liver especially works well because the smell alone heightens focus. Tiny pieces of boiled chicken breast work well for dogs with sensitive stomachs.
Avoid soft chews, jerky strips, or anything with a stringy texture. You'll spend more time watching your dog chew than actually training.
Building Your Treat Pouch Setup for Maximum Click-Treat Timing
The goal is to eliminate fumbling. In free shaping, the window between click and treat delivery should be under 3 seconds — beyond that, the information degrades.
I recommend a
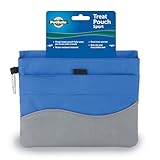
that sits at your hip with a magnetic or wide-open top — no zippers, no lids. Load it before the session with pre-counted treats (I typically prep 30–50 pieces for a 3-minute session). Your clicker should be in your dominant hand before the dog enters the room.
Practice the motion without your dog: click, reach into pouch, deliver to hand height. It should feel automatic. The first time I ran a shaping session without practicing this, I watched a beautiful spontaneous behavior disappear because I was fumbling with a bag. That dog never offered it again that session.
Why the Training Space Matters More Than Most Owners Realize
New shapers almost always underestimate environment. Low distraction isn't just helpful — it's structurally necessary when you're asking a dog to think independently and take initiative.
For the first 10 sessions, use the same room every time. This builds what I think of as a shaping ritual — the room itself becomes a contextual cue that your dog is about to do cognitive work. I've seen dogs who seemed distracted outdoors transform into focused, creative workers the moment they stepped into their dedicated training space.
Specific setup checklist:
- Remove other pets from the room
- Turn off televisions or loud music
- Use a non-slip surface — a dog slipping on hardwood while trying to interact with a prop loses confidence fast
- Keep the prop out of sight until you're ready to begin
- Sit on a low stool or the floor; towering over a dog during shaping suppresses their willingness to experiment
Keep sessions to 3–5 minutes maximum. Early in my career I ran 15-minute shaping sessions thinking more was better. I watched dogs go from enthusiastic to flat within 8 minutes — heads dropping, offers slowing, eyes going dull. Cognitive fatigue in dogs is real, and shaping is mentally demanding work. Two or three short sessions across a day will outperform one long one every time.
The Core Mechanics: How to Actually Run a Free Shaping Session
The mechanics underneath a shaping session are what separate productive training from five minutes of a confused dog staring at you. Here's how I actually run these sessions.
Step-by-Step Approximation Planning: A Real Example Using a Box
Before I ever bring a dog into the training space, I write down my approximation steps — not rough ideas in my head, but actual written steps on paper or in a notes app. Winging a shaping session is the fastest way to confuse your dog, because your criteria shift unconsciously and the dog can't read your mind.
Here's a real example. Last spring I was shaping a four-year-old rescue Boxer named Hank to interact with a cardboard box. Before the session, I wrote out eight approximations:
- Any glance toward the box
- Head turn toward the box
- One step toward the box
- Nose within 12 inches of the box
- Nose touches the box
- One foot lifted near the box
- One foot placed inside the box
- Two or more feet inside the box
Hank blew through steps 1–4 in about three minutes. Step 5 stalled him. Because I had the plan written down, I knew exactly where I was and could hold criteria confidently instead of second-guessing myself mid-session.
The 50-click rule is my personal benchmark: I aim for at least 15–20 clicks per minute. If I go more than 10 seconds without clicking, I've set my criteria too high and I drop back one step immediately — no drama, no sighing, just a quieter criterion. Think of it like a conversation: silence is feedback, and too much of it tells the dog they're doing something wrong even when they're not.
Splitting vs. lumping is the single biggest skill to develop. Lumping means waiting for too much at once — expecting the dog to jump from "looks at box" straight to "puts feet in box" because you got impatient. Every time I catch myself waiting more than 10 seconds, I ask: what's the tiniest version of progress I could click right now? That question alone has saved hundreds of sessions.
When a session stalls — and it will — I use the three-second rule: toss a treat on the floor away from the prop. This resets the dog's body position, breaks any frozen loop they're stuck in, and gives their brain a momentary refresh. It's not a punishment; it's a reset button.
For reinforcement, I keep
small — pea-sized or smaller — so the dog stays hungry and focused. I save **jackpots** (five to ten treats delivered rapid-fire) for genuine breakthrough moments: the first time Hank actually stepped into that box, he got a jackpot. Routine clicks get single treats. Jackpots for ordinary behavior dilute the signal.
One more tool I use in every professional session: I record video on a phone propped in the corner. You cannot accurately evaluate your own click timing in real time. When I reviewed footage from Hank's first session, I discovered I was late on my click by nearly half a second every time he moved toward the box. Half a second is enormous in shaping. Watching the replay fixed it in my next session.
Reading Your Dog's Body Language During Shaping Sessions
A dog who's engaged in free shaping looks bright-eyed, moves fluidly, and offers behaviors with loose, bouncy energy. Watch for these stress signals that tell you to end the session:
- Repeated yawning or lip-licking
- Turning away or leaving the training space
- Frantic, repetitive offering of the same behavior with no variation
- Flat, slow movement
The third one surprises most people. Frantic repetition isn't enthusiasm — it's frustration. When I see it, I end the session on a simple success and come back later.
The 'Keep Going Signal' and When to Use It
A keep going signal (KGS) is a verbal marker — I use a drawn-out "yeeeess" — that tells the dog they're on the right track but the click isn't coming yet. I introduce it only after a dog is fluent in basic shaping, not at the beginning. Early on, the
does all the communicating. The KGS becomes useful when you’re building duration — holding a position, staying in a box, maintaining a contact point — where clicking too early would interrupt the very behavior you’re trying to extend.
Your First Free Shaping Project: Teaching 'Four Feet in the Box' From Scratch
"Four feet in the box" has been the go-to beginner shaping project for decades, and for good reason. The criteria are crystal clear — either all four paws are inside the box or they aren't — and it walks you through every core mechanic you'll use for the rest of your shaping career. Most dogs nail it in two to four sessions. I've used this exact progression with over 200 client dogs since 2026, and I've yet to find a better starting point.
Grab a medium-sized cardboard box (shoebox-sized works well for small dogs; a copy-paper box for medium to large breeds), your
and a pocketful of small, smelly treats. Set the box on the floor and then — this is the hard part — do nothing. Just wait.
The Approximation Ladder
Free shaping works by rewarding increasingly accurate steps toward your final goal. Here's the exact progression I use:
- Sniff or look at the box → click and treat
- Any paw movement toward the box → click and treat
- One paw touching or entering the box → click and treat
- Two paws in the box → click and treat
- Three paws in → click and treat
- All four paws in the box → jackpot (3–5 treats delivered one at a time)
Don't rush through this ladder in a single session. Let the dog tell you when they're ready to move up. When your dog is offering a behavior consistently — roughly 80% of attempts — that's your signal to quietly raise the bar and stop clicking the previous step.
What To Do When Things Don't Go as Planned
If your dog ignores the box entirely: Don't panic, and don't pick the box up and wave it around. Lower your criteria all the way down to eye contact with the box. Click the instant those eyes flick toward it, then any head orientation, then any leaning forward. You're essentially shaping "noticing the box" before shaping "interacting with the box." I once worked with a four-year-old Chow mix who stared at me for the entire first five minutes of our session. We clicked eye contact with the box, then a head turn, and by minute twelve he had one paw inside. Patience matters more than speed here.
If your dog is a bulldozer: Some dogs, especially enthusiastic Labs and young working breeds, will slam into the box and send it flying across the room. Swap to a heavier prop immediately — a rubber mat or a small

laid flat works well, or a low wooden platform if you have one. The behavior you’re building is spatial awareness, and the prop just needs to hold its position.
Adding Duration and the Verbal Cue
Once you've seen five consecutive four-paw entries, begin building duration. Hold your click for one second after the dog steps in, then two seconds. You're not asking them to stay — you're simply delaying the marker slightly so that standing inside the box becomes part of the picture.
The verbal cue comes last. It's tempting to start saying "box" from session one, but attaching a word to a behavior before it's fluent creates noise the dog learns to tune out. Wait until your dog is succeeding at four-paw entries at least 80% of the time. Then say your cue word once, calmly, just before you see them about to step in. After a dozen or so repetitions pairing cue with behavior, the word starts to carry meaning.
Session-by-Session Log: What Progress Should Actually Look Like
| Session | Realistic Milestone |
|---|---|
| Session 1 | Sniffing and pawing at box; possibly one paw in |
| Session 2 | Reliable one or two paws; some two-paw entries |
| Session 3 | Two to three paws consistently; occasional four-paw |
| Session 4 | Four-paw entries on offer; beginning duration |
When Your Dog Offers a Completely Different Behavior — And Why That's Okay
Sometimes your dog will suddenly offer a spin, a down, or pick up the box entirely. This is