Train Your Dog to Walk Past Bikes & Skateboards (2026)
Every single time a skateboard rattles past, your dog loses their mind — and honestly? That's completely normal, and there's a fascinating reason for it that most owners never hear.
I've worked with hundreds of reactive dogs over my 15+ years as a trainer, and wheel-based distractions like bikes and skateboards come up more consistently than almost anything else. More than squirrels. More than other dogs. More than the mailman. The combination of unpredictable speed, low-frequency rumbling, and erratic movement triggers something deeply hardwired in dogs — and once you understand why, the path to fixing it becomes much clearer.
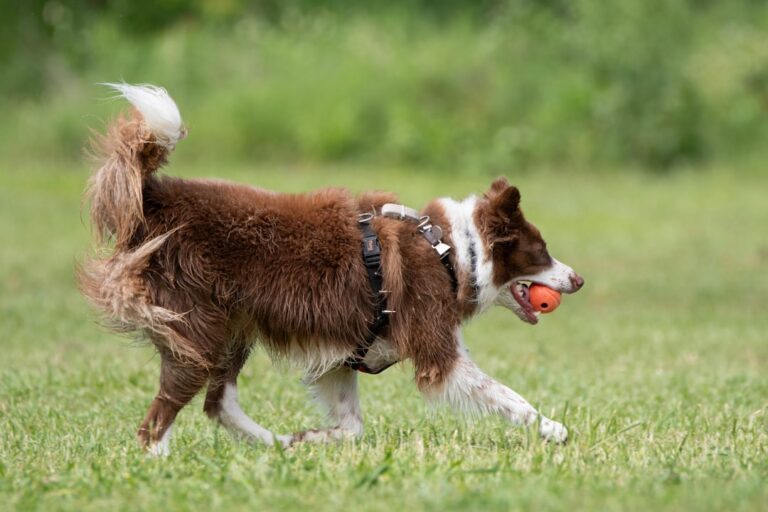
I remember working with a Border Collie mix named Radar in 2026 who would lunge so hard at passing cyclists that his owner had resorted to walking him only at 5 AM to avoid them entirely. Six weeks later, that same dog was calmly holding a heel position as bikes rolled by at a busy park. The transformation wasn't magic — it was a specific, step-by-step process that any committed owner can follow.
This guide covers everything: why wheels trigger dogs the way they do, how to honestly assess where your dog stands right now, and the exact desensitization protocol I use with clients to build lasting, reliable calm around bikes and skateboards. I'll also cover what to do when progress stalls, because it will — and that's okay.
Whether you're working with a reactive rescue or a puppy who hasn't developed bad habits yet, this process works. Let's start by understanding exactly what's happening in your dog's brain when that skateboard rolls by.
Why Bikes and Skateboards Trigger Dogs More Than Other Distractions

In over 15 years of working with reactive dogs, I've kept informal mental tallies of what consistently sends dogs over threshold during on-leash walks. Wheeled vehicles — bikes, skateboards, scooters, rollerblades — rank in my top three every single time, right alongside joggers and unfamiliar dogs. What surprises most of my clients is why these triggers are so uniquely powerful. It's not just that bikes move fast. It's that they do several neurologically provocative things simultaneously, and your dog's brain wasn't built to ignore any of them.
The Science of Predatory Motor Patterns and How Bikes Activate Them
Dogs are hardwired with what behaviorists call predatory motor patterns — a sequence of instinctive behaviors inherited from their wolf ancestors: orient, stalk, chase, grab, bite, dissect. Most domestic dogs have had parts of this sequence selectively bred up or down, but the underlying circuitry is still there, running quietly in the background.
A bike or skateboard is, neurologically speaking, almost a perfect trigger for the early stages of this sequence. Here's why:
- Fast, erratic movement activates the orienting reflex instantly — your dog's head snaps toward anything moving quickly in their peripheral vision
- Direction changes — a skateboarder weaving, a cyclist swerving — mimic the unpredictable flight path of prey, which is specifically what keeps predatory attention locked on
- The wheels themselves produce a high-pitched whirring or grinding sound that falls in a frequency range dogs find particularly alerting. This is a separate stimulus from the visual threat. I've seen dogs react to a bicycle being wheeled around a blind corner before they could possibly see it — purely from the sound
That triple-threat combination — fast visual movement, unpredictable trajectory, and alerting mechanical noise — hits three sensory channels at once. Compare that to a parked car or even a slow-moving stroller, and you start to understand why dogs habituate to most urban distractions but continue to struggle with wheels for months or years without structured training.
Breed predispositions matter here too. Sighthounds like Greyhounds and Whippets are particularly vulnerable to the fast-moving visual trigger — their entire visual cortex is optimized for detecting motion. Herding breeds like Border Collies and Australian Shepherds often lock into the erratic movement and try to control it, which looks like lunging but is actually a deep-wired herding impulse. Terriers, bred to chase fast-moving quarry, can go from calm to volcanic in under a second. Knowing your dog's heritage helps you understand why they react, which shapes which training approach will be most effective — something we'll dig into in later sections.
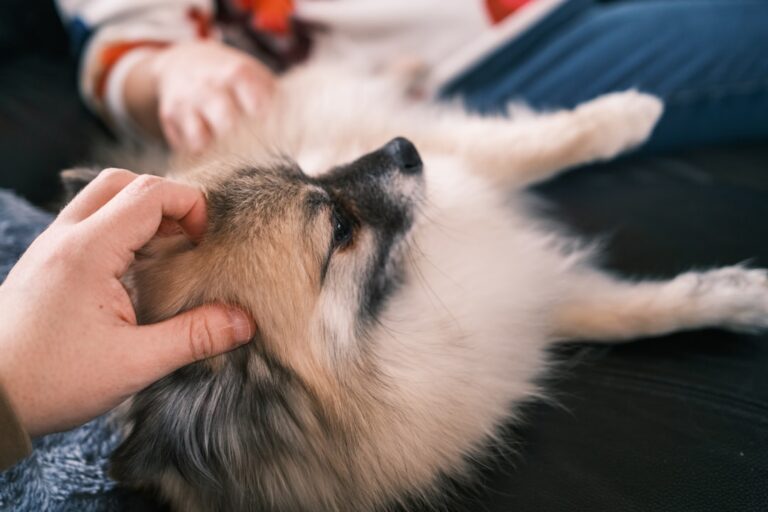
Fear-Based Reactivity vs. Prey-Driven Reactivity: How to Tell the Difference
This distinction is one of the most important — and most overlooked — assessments a dog owner needs to make before starting any training protocol. The behavior looks similar from the outside (lunging, barking, pulling hard on the leash), but the emotional state driving it is completely different.
I worked with a Labrador mix named Scout in early 2026 whose owner was convinced he wanted to chase every skateboard that passed. When we slowed everything down and watched closely, Scout's body language told a different story: his tail was tucked, his pupils were dilated, and he was actually trying to increase distance — the leash just prevented it, so lunging became his only option. That's fear-based reactivity dressed up as aggression.
Here's how to read the difference:
Signs of prey-driven reactivity:
- High tail carriage, forward weight shift, ears pricked forward
- Highly aroused but not panicked — dog may whine with excitement
- Dog wants to close the distance
- Disengages quickly once the trigger passes
Signs of fear-based reactivity:
- Low or tucked tail, wide eyes, body crouching or trying to retreat
- Barking that sounds desperate or alarm-like rather than excited
- Dog wants to increase distance
- Slow to settle after the trigger has passed; may pant or pace
A
and
are useful for both types — but the specific protocol you’ll use, and how slowly you’ll need to progress, differs significantly between them. Getting this diagnosis right from the start will save you weeks of frustration.
Assessing Your Dog's Current Reactivity Level Before You Start
Before you set up a single training session, you need honest, objective data about where your dog actually stands. I've seen well-meaning owners jump straight into exposure work, only to accidentally push their dog deeper into reactivity because they skipped this step. Knowing your dog's threshold — the exact distance at which they first notice and react to a bike or skateboard — is the single most important measurement you'll take in this entire process.
The 3-Tier Reactivity Scale
Not all reactions look the same, and the training approach that works for one tier can completely backfire with another. Here's how I categorize dogs before we start any work:
-
Tier 1 — Alert but Recoverable: Your dog stiffens, ears go forward, tail raises. They may stare hard at the passing bike, but when you call their name or offer a treat, they can re-engage with you within a few seconds. This is the most workable starting point.
-
Tier 2 — Lunging or Barking, Hard to Redirect: Your dog is vocalizing, pulling toward or away from the trigger, and it takes real effort to break their focus. They might take a treat, but grudgingly, and they snap back to staring immediately. Most dogs I work with start here.
-
Tier 3 — Completely Over Threshold: Your dog cannot take food, cannot respond to their name, and may be spinning, screaming, or throwing themselves against the leash. At this point, the thinking brain has essentially gone offline. Pushing closer in this state doesn't train anything — it just adds to the trauma.
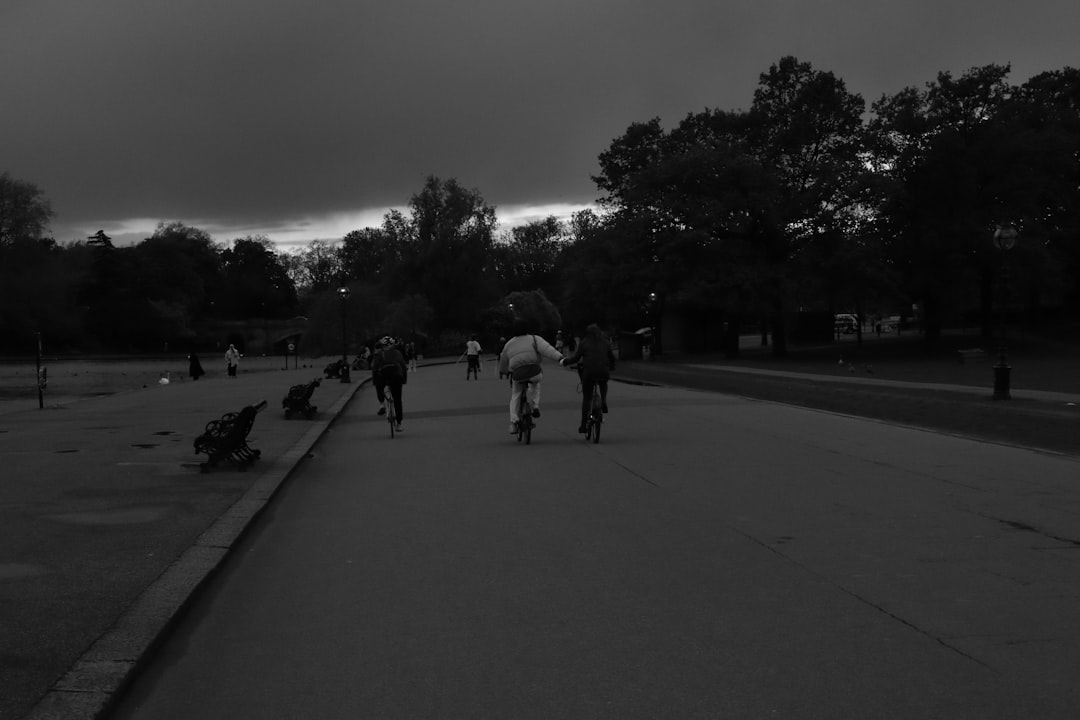
How to Conduct a Safe Solo Assessment
Find a spot near a bike path or skate park on a weekday morning when traffic is lighter and predictable. Bring

— something genuinely high-value, like small pieces of chicken or cheese — and a

so you have control without being jammed against your dog.
Start at 100 feet from the path. Watch your dog's body, not the bikes. Do they notice passing cyclists? What changes in their posture? Then move to 75 feet and repeat. Then 50 feet. Don't push closer than the point where you see your first stress signal — that distance is your threshold, and it's your new training starting line.
I did this exact assessment with a three-year-old Border Collie mix named Remy whose owner was convinced he was "fine until a bike gets close." At 100 feet, Remy was loose and sniffing. At 75 feet, his ears pinned forward and his tail stiffened — classic Tier 1 signals his owner had never noticed because they were usually watching the road. His real threshold was 80 feet, not 10. We started training there, and it made all the difference.
Reading Canine Body Language Specific to Wheeled-Object Reactivity
Wheeled objects trigger a specific cluster of body language that's slightly different from other reactivity triggers, because they move and make noise simultaneously. Watch for:
- Predatory stare: eyes locked, body lowering slightly, weight shifting forward
- Freeze: sudden stillness mid-walk, often before a lunge
- Whale eye: showing whites of the eyes while tracking the object
- Piloerection: hackles raised along the spine (sometimes just at the shoulders)
- Hard panting or lip licking: stress signals that often appear before the explosive reaction does
Film three separate assessment sessions before you start any training. Your phone propped on a bag works fine. Video gives you objective evidence — after six weeks of work, memory is unreliable, but footage doesn't lie. You'll also capture body language details you missed in the moment.
When to Consult a Professional Behaviorist vs. DIY Training
Most Tier 1 and manageable Tier 2 dogs can make excellent progress with a structured DIY protocol. Consult an IAABC- or CPDT-KA-credentialed behaviorist — not just a general trainer — if your dog shows any of the following:
- Any bite history toward humans or other animals
- Complete inability to take food even at 100+ feet from the trigger
- Self-injury attempts: throwing themselves into fences, flipping backward off the leash
- Reactivity that has escalated rapidly in a short time
These aren't signs of a bad dog or a failed owner. They're signs that the nervous system needs a more specialized approach, possibly including a veterinary behaviorist's assessment. Getting the right help is actually the most efficient path forward.
The Foundation Skills Your Dog Must Have Before Exposure Training
Here's the mistake I see constantly: an owner watches a YouTube video about desensitization, loads up their treat pouch, and walks their dog straight toward a busy bike path on day one. Their dog lunges, they panic, everyone goes home feeling defeated. The problem wasn't the technique — it was the missing foundation.
Think of exposure training like building a house. The desensitization protocol is the frame and walls, but without a solid foundation underneath, the whole thing collapses under pressure. These four skills need to be genuinely reliable before you introduce a single spinning wheel.
Teaching a Rock-Solid 'Look at Me' Cue in 5 Days
The 'look at me' or focus cue is your most important tool in this entire process. Aim for a 95% success rate in a calm, low-distraction environment before moving forward — and that's not as strict as it sounds. It just means practicing consistently.
Here's a simple 5-day plan:
- Days 1–2: Hold a treat at your eye level and say "look at me" the moment your dog makes eye contact. Mark with a "yes!" and reward. Ten reps per session, two sessions daily. Inside your home only.
- Days 3–4: Move to your backyard or a quiet hallway. Add mild distractions — the TV on, another family member walking by. Same cue, same reward.
- Day 5: Take it to the end of your driveway or a quiet sidewalk. If you're getting 9 out of 10 correct responses, you're ready to use it in real training.
What you're building here isn't just a trick — it's a pattern interrupt. When your dog locks eyes on a skateboard from 30 feet away, "look at me" gives you a split second to redirect that focus before the arousal spiral starts.
Loose Leash Walking and the 'Find It' Cue
Before adding wheeled vehicles into the picture, your dog needs to understand one non-negotiable leash rule: tension equals stopping. Spend a minimum of two weeks practicing this in a quiet neighborhood. The moment the leash tightens, you stop walking. When your dog releases the pressure and looks back at you, you move forward again. It's repetitive work, but it teaches your dog that pulling is literally counterproductive.
Alongside this, train the 'find it' scatter-feed cue. Toss 10–15 small pieces of food on the ground and say "find it!" enthusiastically. Practice this at home until your dog responds immediately — nose down, hunting for treats.
I had a client named Marcus whose Border Collie would visually lock onto bikes from nearly a block away, completely unreachable in that state. We started using 'find it' to break that stare the moment she spotted movement. Nose-down sniffing is physiologically incompatible with high-alert scanning — you literally cannot do both at the same time. That scatter feed became our emergency brake.
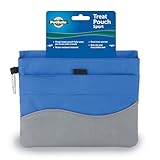
Conditioning Your Treat Pouch
This step gets skipped constantly. Your
needs to be **pre-loaded with meaning** before you ever use it near a stressful trigger. Spend one week doing nothing but opening the pouch, making that characteristic rustle sound, and immediately feeding your dog something wonderful. Do this 20–30 times a day.
By the time you need that pouch as a counter-conditioning tool next to a skate park, your dog should already be swiveling their head toward you at the sound of it. That's a conditioned emotional response (CER) — an automatic, positive association built in advance, not scrambled to create under pressure.
Choosing the Right Equipment: Harnesses, Leashes, and What to Avoid
Equipment matters more than most people expect. A reactive dog on a flat collar or a back-clip harness gives you very little steering control — and any pressure on a tight collar during a stress response can actually amplify anxiety.
A front-clip harness is strongly recommended for this work. The
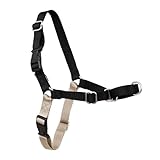
options specifically designed with a chest attachment point — like the Ruffwear Front Range or the Freedom Harness — redirect your dog’s momentum toward you rather than allowing them to pull straight ahead. This is about **steering, not punishment**.
What to avoid:
- Retractable leashes — zero control at variable distances
- Prong or choke collars — pain during trigger exposure creates negative associations and worsens reactivity over time
- Back-clip harnesses — they actually make pulling easier and more comfortable
Use a standard 4–6 foot leash for this training phase. The consistency of a fixed length helps both of you predict distance and manage space.
Get these foundations genuinely solid — not "good enough" — and every step of the exposure training ahead will go significantly smoother.
Desensitization and Counter-Conditioning: The Step-by-Step Protocol
Let me be clear about something that trips up a lot of well-meaning owners: desensitization (DS) and counter-conditioning (CC) are two distinct processes, but they must happen at the same time to work. Desensitization gradually reduces your dog's emotional arousal through controlled, repeated exposure at a manageable distance. Counter-conditioning replaces the existing negative emotional association — "that thing is terrifying" — with a positive one: "that thing predicts something amazing." Do one without the other and you're leaving serious progress on the table.
Building Your Exposure Hierarchy: A 6-Week Progressive Plan
The exposure hierarchy is your roadmap. Skipping steps because your dog "seems fine" is one of the most common mistakes I see, and it's how you end up back at square one after a bad encounter.
Here's the progression I use with my clients, roughly mapped to a six-week timeline:
- Week 1: Stationary bike at 50 feet — your dog notices it, you deliver a treat, you move on
- Week 2: Stationary bike at 20 feet — same calm observation game, higher proximity
- Week 3: Slow-rolling bike at 50 feet — movement is now introduced, but distance buffers the intensity
- Week 4: Slow-rolling bike at 30 feet — closing the gap with movement in the picture
- Week 5: Skateboard sounds only — use an audio recording played at low volume through a speaker; this isolates the acoustic trigger without visual overwhelm
- Week 6: Real skateboard at distance — start at 50+ feet and compress gradually across multiple sessions
Each stage only advances when your dog can watch the trigger, eat their treat, and return their attention to you without any stiffening, staring, or stress signals. If that's not happening consistently across three sessions at a given level, stay put. Progress isn't a calendar — it's a behavioral benchmark.
High-Value Treat Selection and Why Kibble Won't Cut It
Kibble is not going to work for this kind of training. When your dog's sympathetic nervous system is activated — even mildly — their appetite for boring food drops dramatically. You need something with genuine biological pull.
My go-to options are real boiled chicken, string cheese, or hot dog slices cut small (about the size of your pinky fingernail). These aren't just "better treats." They're neurologically different — high-fat, high-protein foods trigger a stronger dopamine response, which is exactly what you need to overwrite an anxiety association.
Timing is everything here. The treat must appear within 1.5 seconds of your dog noticing the trigger — not after they've already locked in, tensed up, or started vocalizing. If you're fumbling in your pocket while your dog is already lunging, you've missed the window. A
worn on your hip eliminates that delay and keeps your hands ready.
I worked with a Border Collie mix named Remy in early 2026 who had been reactive to bikes for over a year. His owner had been using training biscuits and couldn't understand why nothing was changing. We switched to chicken, backed up to 50 feet from a stationary bike, and within two sessions Remy was orienting toward his owner when a bike appeared instead of fixating on it. Same dog. Different treat. Different outcome.
Setting Up Practice Scenarios: Working With Friends, Bike Paths, and Skate Parks
Controlled rehearsal beats hoping the real world cooperates. For early stages, recruit a friend with a bike to ride slowly at consistent speeds — ideally someone patient enough to repeat passes five or six times in a single session. Unpredictability is the enemy when you're building new associations.
A
Hi Kiss Long Dog Training Lead
Similar Posts
Dominance Theory Dog Training Debunked: Science-Based Facts
Introduction Sarah was at her wit's end. Her rescue dog, Max, would pull on the leash, jump on guests, and refuse to come when called. A well-meaning neighbor told her she needed to "show him who's boss" and "be the alpha." So Sarah tried it all—she ate before Max, walked through doors first, and even…
Dog Aggressive During Grooming? Muzzle Training Guide
Introduction: When Grooming Becomes a Battle If your dog snaps, lunges, or tries to bite during bath time or nail trims, you're not alone—and you're facing a genuinely dangerous situation. I've seen too many owners with puncture wounds on their hands, groomers refusing service, and dogs becoming increasingly fearful with each grooming attempt. This cycle…