Deaf Dog Training Hand Signals: Complete Guide 2026
Most people assume that training a deaf dog must be harder than training a hearing dog. After working with hundreds of dogs over the past 15+ years — including dozens of deaf and hearing-impaired dogs — I can tell you the opposite is often true.
Deaf dogs are, in many ways, exceptional students. They're already paying close attention to your body language in ways hearing dogs sometimes don't bother to, because for them, visual communication isn't a backup system — it's the only system. What looks like a limitation on paper frequently becomes a genuine advantage in the training room.
That said, there's a real learning curve. The first deaf dog I trained extensively was a Dalmatian named Scout. I made every classic mistake: inconsistent hand signals, poor eye contact habits, and terrible timing on attention-getting. Scout was patient with me. Most dogs are. But those early stumbles taught me exactly where deaf dog training breaks down — and how to fix it.
This guide covers everything you actually need: building a core signal vocabulary, running effective training sessions, mastering the skill most owners completely overlook (getting your dog's attention reliably), and eventually navigating real-world environments like busy parks, vet offices, and off-leash trails.
Whether your dog was born deaf, lost hearing gradually through age or illness, or has partial hearing that may continue to decline, the methods here work — and they're all rooted in positive reinforcement.
Let's start with something that surprises almost every new deaf dog owner: understanding what actually changes when your dog can't hear you, and — just as importantly — what stays exactly the same.
Understanding Your Deaf Dog: What Changes and What Doesn't

If you've just learned your dog is deaf — whether it's a brand-new puppy or a companion you've had for years — here's what I tell every client in our first consultation: this is not a tragedy, and it is not a limitation you can't work around. It's a different communication challenge, one that many deaf dogs handle better than their owners initially expect.
Deafness is more common in dogs than most people realize. Roughly 5–10% of the dog population has some degree of hearing loss, and certain breeds carry significantly higher rates. Dalmatians, Australian Shepherds, Bull Terriers, and white-coated Boxers all show elevated incidence because of genetic links between the piebald and merle coat genes and abnormal cochlear development. If you own one of these breeds, deafness wasn't random bad luck — it was always a statistical possibility.
The single most important thing to understand before we get into any training method: a deaf dog's brain is completely intact. The capacity for learning, memory, emotional bonding, and complex behavior is entirely unaffected. You're not working with a diminished animal. You're working with an animal whose primary sensory input has shifted from auditory to visual — and dogs, as a species, are already extraordinarily attuned to visual cues. In some ways, you're meeting them closer to where they naturally live.
Confirming Deafness: The BAER Test and At-Home Checks
Before building any training plan, you need to know what you're working with. Bilateral deafness (both ears) and unilateral deafness (one ear) require slightly different approaches, and you can't reliably distinguish them at home.
The gold standard is the BAER test — Brainstem Auditory Evoked Response. It's a painless, non-invasive neurological test that measures electrical activity in the brain in response to sound. A veterinary neurologist places tiny electrodes near your dog's ears and scalp, plays clicking sounds, and reads the response. The whole appointment usually takes under an hour. As of 2026, most veterinary neurology practices and university teaching hospitals offer it, with costs typically ranging from $75 to $250 depending on location.
At-home checks can give you a rough idea but should never replace BAER testing. Informal tests — clapping behind the dog's head, shaking a treat bag while they face away — are unreliable because dogs are masters at detecting vibration and air movement. I've seen owners convinced their dog "passed" a home test, only to discover unilateral deafness at BAER. That matters, because a dog with one working ear still benefits from hand signals but may have some residual auditory context you can leverage.
How Deaf Dogs Experience the World Differently — and How to Work With It
A deaf dog doesn't experience the world as a muted, diminished version of a hearing dog's life. They experience it as their normal — a world of vibration, scent, visual motion, and tactile sensation, all turned up sharply because those channels haven't had to share bandwidth with sound.
One of my favorite clients was a Dalmatian named Rudy — born deaf, diagnosed at eight weeks via BAER, and absolutely brilliant. His owner was devastated at the initial diagnosis. By our third session, Rudy was outperforming the hearing dogs in the class on focus and duration of eye contact because nothing in the room was pulling his attention away. No barking from the next room. No squeaky toy in someone's bag. Just his owner's hands, and the

appearing when he got it right.
This leads to the misconception I spend the most time correcting: deaf dogs are not more aggressive, not less intelligent, and not harder to train. Congenitally deaf dogs — those born without hearing — often outpace hearing dogs in early training because they've never learned to rely on verbal cues and adapt to hand signals with almost zero transition friction.
Dogs who acquired deafness later in life present a different picture. They may seem confused or startled during early training because they're used to a verbal world that has gone silent. That adjustment period is real and deserves patience — but it's temporary, not permanent.
What changes when training a deaf dog is the delivery system for information. What doesn't change is the dog's ability to receive it, learn from it, and thrive on it.
Building Your Hand Signal Foundation: The Core Vocabulary Every Deaf Dog Needs
Before you teach your deaf dog a single command, you need a plan — and that plan starts with choosing your signals carefully. I've watched owners jump straight into training only to realize three weeks in that their "Sit" and "Stay" signals look nearly identical from across the room. Starting over costs you time and, more importantly, costs your dog confidence. Do this part right, and everything else builds cleanly on top of it.
Eight core signals cover roughly 90% of situations you'll encounter in daily life. Master these first, and you'll have a genuinely functional communication system before you ever move to the advanced work.
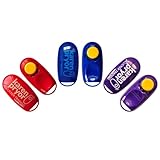
The Thumbs-Up Marker Signal: Teaching the Foundation Before Commands
Teach your reward marker signal before you teach anything else. Everything depends on it.
The marker signal functions exactly like a clicker or the verbal "Yes!" in spoken-word training. It tells your dog precisely which behavior earned the reward — not the sit itself, but the moment their hindquarters hit the ground. Without a clear marker, you're handing your dog a treat with no explanation attached.
The signal I use — and recommend to every client — is an open-palm thumbs-up held at chest height. It's visually bold, naturally enthusiastic, and distinct enough from every other signal in the vocabulary that dogs simply never confuse it. After marking, reward immediately with
delivered within 1-2 seconds.
To build the association, spend two or three short sessions just pairing the thumbs-up with a treat — no commands, no criteria. Flash the signal, deliver the treat. Flash it again. Your dog should start showing anticipation (ears perked, leaning forward) within 10-15 repetitions. That anticipation tells you the marker is loaded and you're ready to begin real training.
Choosing Signals That Don't Blur Together
Visual contrast isn't a preference — it's a training necessity. My rule: any two signals in your dog's vocabulary should be distinguishable from 20 feet away, even in dim lighting. If you have to think twice about which signal is which, your dog is already confused.
A client in 2026 had a Border Collie mix named Pepper who was struggling terribly with "Come" and "Watch Me." When I watched them work, I immediately saw the problem — both signals involved a pointing motion toward the face. From Pepper's distance, they were essentially the same gesture. We redesigned "Come" as a sweeping arm motion toward the chest, and within a week Pepper's response rate jumped dramatically.
When designing or selecting your signals, ask yourself:
- Does this involve one hand or two?
- Is the motion toward the body, away from it, or stationary?
- Is the hand position open, closed, or pointing?
- How large or small is the gesture overall?
Signals that differ across multiple dimensions — movement, location, and hand shape — will hold up reliably even at distance.
Printable Signal Reference Guide: Descriptions for All 8 Core Signals
Write these down before your first training session and keep them consistent. Changing a signal mid-training sets you back two to three weeks — the dog hasn't forgotten the behavior, but the mismatched cue creates genuine confusion they have to work through.
| Signal | Description |
|---|---|
| Yes/Good (Marker) | Open palm facing dog, thumbs-up at chest height |
| Watch Me | Index finger pointed at your own eyes, held briefly |
| Sit | Index finger pointed upward, single firm raise |
| Down | Flat hand, palm facing floor, pressed downward |
| Stay | Flat palm facing dog, held toward them like a stop sign |
| Come | Both arms sweep open wide, then cross toward chest |
| Leave It | Closed fist, sharp turn away from the object |
| No/Stop | Quick X shape crossed in front of chest with both forearms |
ASL vs. Custom Signals: Which Should You Use?
American Sign Language signals have one real advantage: if someone else — a vet, a dog sitter, a family member — ever needs to handle your dog, standardized signs are easier to teach them quickly. Many trainers, myself included, pull several signals directly from ASL for exactly this reason.
Custom signals give you total flexibility to build something maximally distinct for your specific dog. My practical recommendation is a hybrid approach: use ASL where it works cleanly, and modify or replace any sign that looks too similar to another in your vocabulary.
Whatever you choose, write it down with the descriptions above. Your consistency is the whole foundation.
Step-by-Step Training Sessions: Teaching the First 4 Commands
Before we touch a single command, let's talk about session length — because this is where most owners set themselves up to fail without knowing it.
Keep sessions to 3-5 minutes, repeated 3-4 times per day. Deaf dogs are working significantly harder than hearing dogs during early training. They're processing visual information intensely, reading your body language, watching your hands, and tracking your face — all simultaneously. That kind of focus is exhausting. I've watched dogs who started a session sharp and engaged turn glassy-eyed and disengaged around the seven-minute mark. Owners often push through, thinking the dog is being stubborn. They're not. They're cognitively spent.
Short sessions also mean you can end on success almost every time, which is gold.
Teaching Sit: The Lure-Fade Method With Visual Timing
The lure-to-signal sequence works in three stages:
- Lure the behavior — Hold a
pinched between your fingers, bring it slowly over your dog’s nose and back toward their tail. Their bottom drops. The moment it does, reward immediately.
2. **Pair the signal simultaneously** — Once the dog is following the lure reliably (usually 8-10 reps), add your chosen Sit signal *at the same moment* you present the lure. I use an open hand, palm up, sweeping upward — but consistency matters more than which signal you pick.
3. **Fade the lure** — Start presenting the signal without food in that hand. Reward *after* the sit with your other hand. Most dogs make this transition cleanly by **days 5-7**.
Timing your reward matters enormously here. With a hearing dog, you can use a clicker or a verbal marker to bridge the gap between behavior and reward. With a deaf dog, use a visual marker — a thumbs-up, a quick double-tap on the chest, or a
held at nose level so the dog sees it click. Pick one and stick to it.
Teaching Down: Two Approaches and Which to Start With
There are two ways to teach Down: from a Sit and from a Stand. Start with Sit-to-Down.
From a sit position, lure your dog's nose straight down toward the floor between their front paws, then slowly forward. The elbows follow. The signal I use is a flat hand, palm facing down, pressing toward the floor — intuitive and easy to distinguish from Sit.
Stand-to-Down is more practical in real life (think: your dog is running toward you and you need them to drop), but it requires more independent muscle memory and is harder to teach without the sit as a foundation. Once your dog has a solid Sit-to-Down, the stand version usually follows within a week or two of deliberate practice.
Teaching Stay: The 3D Framework and Why Distraction Comes Last
Stay is where most training falls apart — and the reason is almost always the same. Owners add Duration, Distance, and Distraction all at once.
The framework is non-negotiable: Duration first. Distance second. Distraction last.
- Duration: Ask for Stay, wait 2 seconds, return to your dog, reward. Gradually increase to 5, 10, 30 seconds before you ever move your feet.
- Distance: Only after the dog holds a 30-second stay confidently. Take one step back. Return. Reward. Not two steps — one.
- Distraction: This comes weeks later, not days.
A client in 2026 had a young Dalmatian with an impressive Stay at home — until someone walked by. She'd skipped distraction proofing entirely and tried adding it in week one alongside distance. We went back to a 1-foot stay with zero distractions and rebuilt from there. Two weeks later, that dog held a stay outside a coffee shop.
Teaching Come (Recall): The Most Critical Signal for Safety
For recall, I use both arms sweeping inward toward my chest — a big, welcoming motion visible at distance. Make this signal unmistakably joyful. Big movement. Crouch down if needed. Reward every single recall in early training, no exceptions.
Practice recall in low-distraction environments first using a

so your dog can’t self-reward by running off. Build in the real world later. A reliable recall is the one signal that can keep a deaf dog safe when it matters most.
Getting Your Dog's Attention: The Deaf Dog Owner's Most Underrated Skill
Your hand signals are only as good as your dog's eyes. Every signal in your vocabulary — sit, stay, come, leave it — becomes completely useless the moment your dog is looking the other direction. Attention-getting isn't just one piece of the puzzle. It is the puzzle. Most guides spend three paragraphs on it and move on. It deserves far more than that.
The 5 Methods, Ranked
Over years of working with deaf and hard-of-hearing dogs, I've found these techniques range widely in their effectiveness and appropriate context. Here's my honest ranking:
- Taught automatic eye contact — the gold standard, more on this below
- Vibrating collar — fast, reliable at distance, genuinely underrated
- Floor vibration tap — a light stomp near the dog works surprisingly well on hard floors and even some carpets
- Shoulder tap — reliable but requires proximity and proper conditioning
- Flashlight or laser pointer — useful outdoors at night or across a large yard, but situational
Each method has its place. The mistake most owners make is relying on just one.
The Shoulder Tap Protocol: Teaching a Calm Response to Touch
A shoulder tap sounds simple — just touch your dog, right? But if you've ever startled a sleeping deaf dog with an unexpected touch, you know it can result in a defensive snap. This isn't aggression; it's a startle reflex. The solution is systematic desensitization.
Start when your dog is awake and relaxed. Touch the shoulder, then immediately deliver a high-value treat — small pieces of real chicken or
work well for this. Repeat 20 times across two or three short sessions. Within a week, most dogs associate the shoulder touch with good things and stop flinching entirely.
A Dalmatian named Biscuit in 2026 had been surrendered partly because his family kept accidentally startling him. Within ten days of this protocol, he was leaning into shoulder taps. Same dog, completely different response — because someone took the time to make the touch predictable and rewarding.
Once the touch is conditioned, pair it immediately with your "look at me" hand signal. The tap becomes a bridge to attention rather than a surprise.
Vibrating Collars: How to Introduce Them Without Causing Startle Responses
Let me address the controversy directly: vibrating collars are not shock collars. The sensation is more like a phone buzzing against your leg than anything aversive. That said, an unconditioned dog can find the vibration alarming at first — so introduction matters enormously.
I've used both the Dogtra ARC 800 and the SportDog SD-425X with deaf dogs. Both have vibration-only modes with no e-stim function, which is exactly what you want. The SportDog has a slightly gentler vibration intensity at the lowest setting, which I prefer for smaller or more sensitive dogs.
The introduction protocol follows the same logic as the shoulder tap: vibrate, treat, repeat. Do this 15–20 times in a single session. Within two or three sessions, the dog should be orienting toward you when they feel the vibration. At that point, you've created a reliable long-distance attention cue that works across a dark yard, through a crowded park, or any time your dog's back is turned.
Building Automatic Check-In Behavior Through Passive Reinforcement
This is my single favorite technique for deaf dogs, and it requires almost no formal training sessions.
The concept is simple: every time your dog voluntarily looks at you, mark and reward it. Keep
on you around the house during this phase. The moment your dog glances in your direction — flash the thumbs-up and treat. Don’t ask for it. Just catch it and reinforce it.
Over 3–4 weeks, the dog starts checking in more and more frequently because it has become reliably rewarding. I've seen dogs go from near-zero spontaneous eye contact to checking in every 20–30 seconds during walks.
This isn't just convenient — it's the foundation of your entire communication system. A dog who habitually watches you is a dog who will see your signals.
Intermediate and Advanced Signals: Expanding Your Dog's Vocabulary
By the six to eight week mark, most of my clients' deaf dogs have a solid grip on the core vocabulary — sit, down, stay, come, leave it, and a handful of others. Training then shifts from functional to genuinely impressive, and owners' confidence transforms alongside it. They stop managing their dog and start communicating with them.
Here's what I introduce next, and how.
The Heel Signal and Leash Manners for Deaf Dogs
Heel is one of the most satisfying signals to teach a deaf dog because the feedback loop is so immediate. My signal is a flat hand patting the outside of my left thigh twice — distinct enough to catch peripheral vision, but simple enough to execute mid-walk.
The key difference from hearing dog training is that you cannot use your voice as a bridging cue while your dog drifts ahead. You have to interrupt loose-leash walking with a hand touch or a light vibration from a

Similar Posts
How to Crate Train Your Puppy: A Complete Step-by-Step Guide
Crate training is one of the most misunderstood aspects of raising a puppy. Some owners feel guilty about it, imagining their puppy locked in a cage. But here’s the reality I’ve seen after working with hundreds of puppy owners: dogs are den animals by nature, and a properly introduced crate becomes their safe space—a place…
Adolescent Dog Regression Training Tips That Work
Understanding Adolescent Dog Regression: What’s Happening in Your Dog’s Brain If your once-perfect puppy suddenly acts like they’ve never heard the word “sit” in their life, welcome to dog adolescence. I’ve watched countless frustrated owners nearly pull their hair out when their six-month-old dog seems to forget everything they’ve learned. But here’s the truth: your…
Dog Scared of Children? How to Train & Build Confidence
Introduction: Understanding Why Your Dog Is Scared of Children You're at the park when a child runs toward your dog with outstretched arms, and your stomach drops. Your usually friendly dog backs away, tail tucked, or worse—lets out a warning growl. That sinking feeling? You're not alone. Fear of children is one of the most…
Loose Leash Walking Without Treats: It Works (2026)
Most dog trainers will tell you that treats are non-negotiable for loose leash walking. After 15 years working with hundreds of dogs, I'm here to respectfully disagree. I've trained everything from hyperactive Border Collies to stubborn Basset Hounds, and I've watched plenty of owners succeed beautifully without a single piece of chicken in their pocket….